Skip the story and jump to the gist of it here, or straight to the review of the
frame-pack, cokckpit-pack, handlebar-pack, accessory-pack, seat-pack.
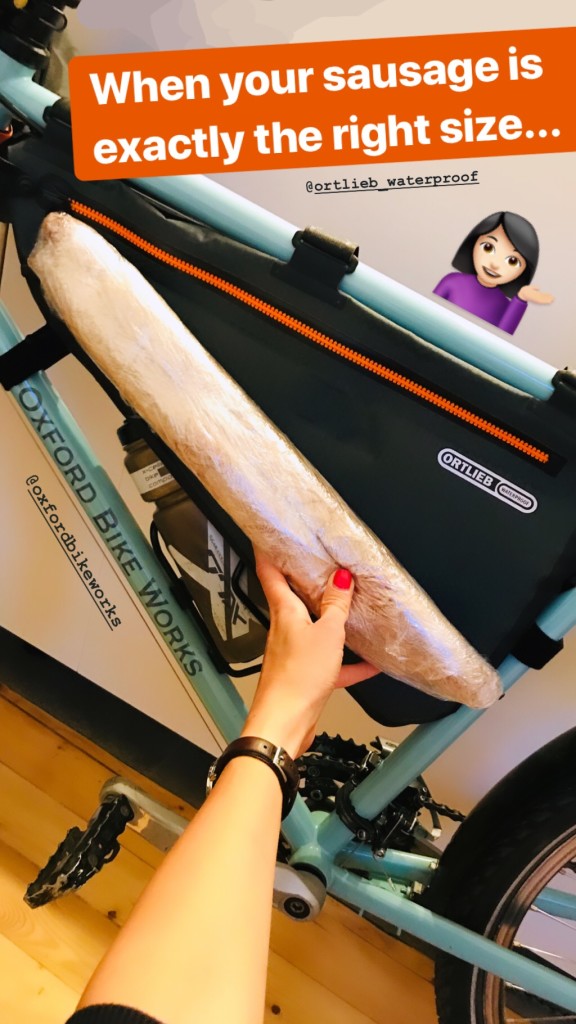
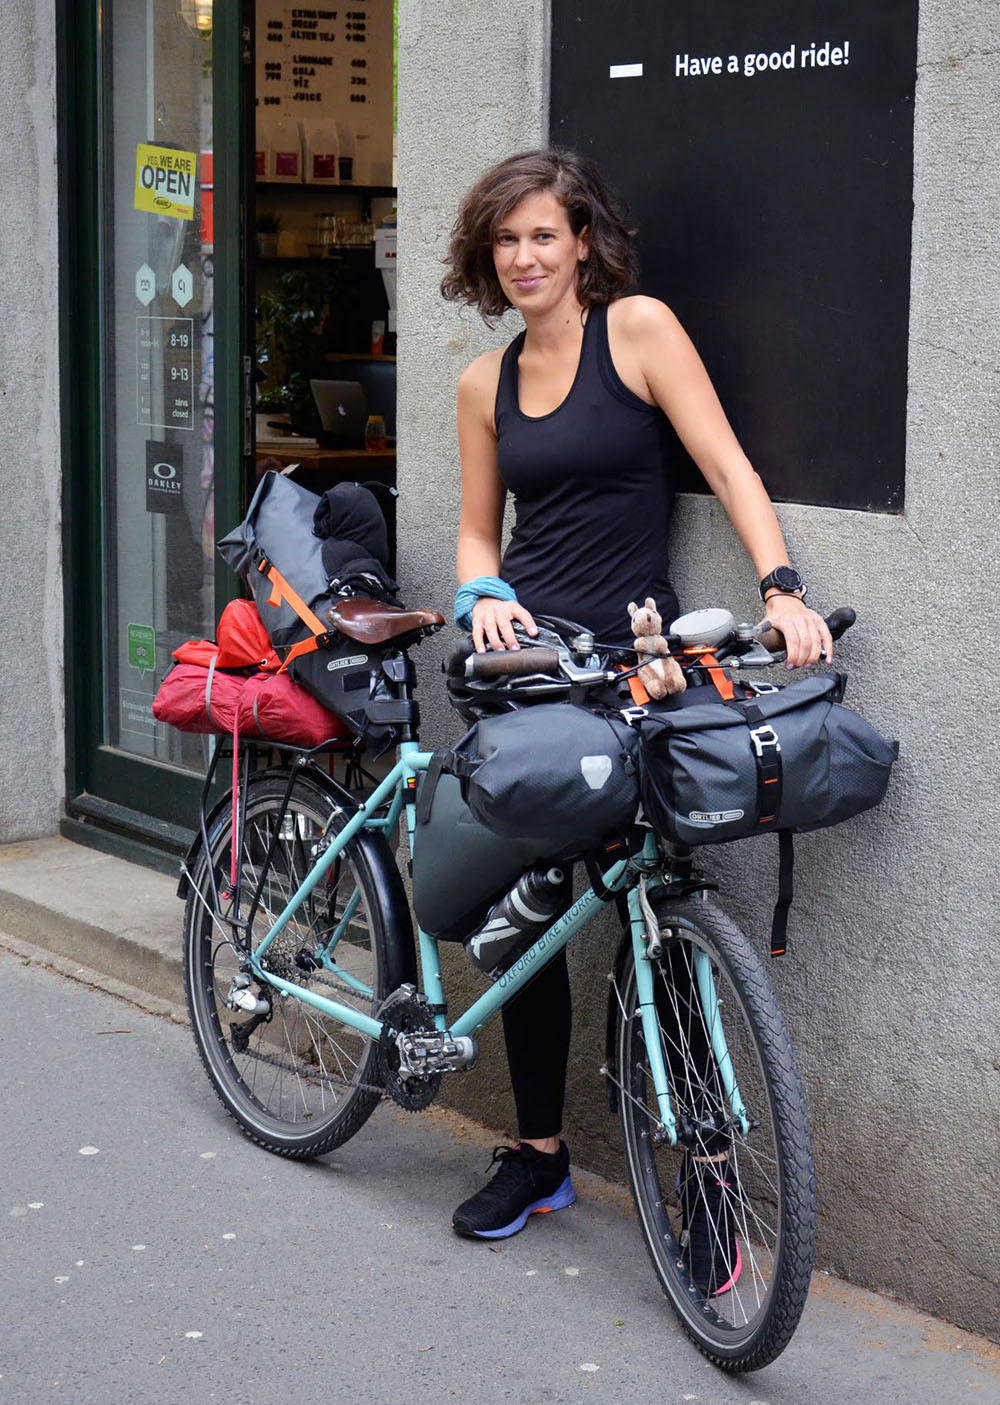
Only one day until the start of my new adventure. I’m standing in the center of my favourite bike shop in Budapest, Mesterbike, surrounded by all my kit and occupying most of the floor space around me. Time to box up Libby and the equipment, before our flight to Málaga.
A guy walks in with a shiny roadster and rolls his eyes at the mess at my feet. I know that look. In fact, I’m used to giving that look. This is how I eyed up a certain cycle tourer, Max Peer when he passed me in the middle of Kyrgystan. He was fully loaded AND he was towing a large trailer. I rolled my eyes and thought, there’s no way someone can justify carrying that much sh*t. I stood both corrected and humbled when he explained that indeed, he’s fully loaded, carrying a week-worth of food supplies, and what he’s towing is a three-person kayak, which he can comfortably fit his bike on. It’s nice to mix up pedaling with paddling, you know when a lake appears on the horizon and one doesn’t feel like cycling around it. It seemed like he explained this before and I’m sure he enjoyed witnessing the familiar change of facial expression on my face: from smugness to amazement. Needless to say, I’ve been enviously following his adventures ever since.
Back at Mesterbike, I found much joy in witnessing the same change of expression, when I explained that all this around me is being packed for a 2-month adventure, not a weekend ride in the hills. At this point, I thought I have established some credibility, but then he looked closer at my bike and said:
“You know you have to put some frame protector tape under those bags, right?”
“Do I?”
“Oh yes, otherwise the dirt and sand that gets under the straps will scratch the paint off your bike.”
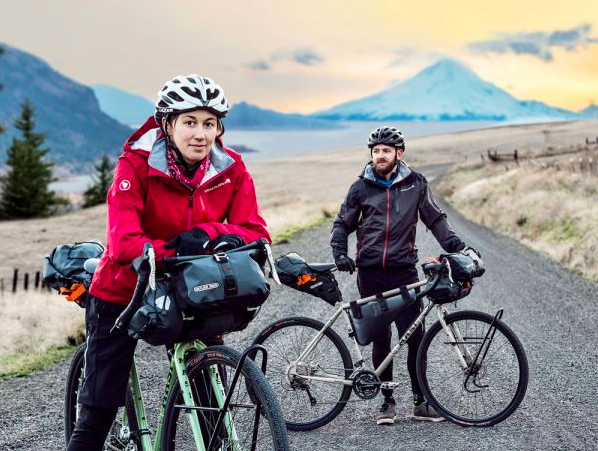
Our Trip | Málaga to Dakar
The below review is based on the little adventure ride that followed.
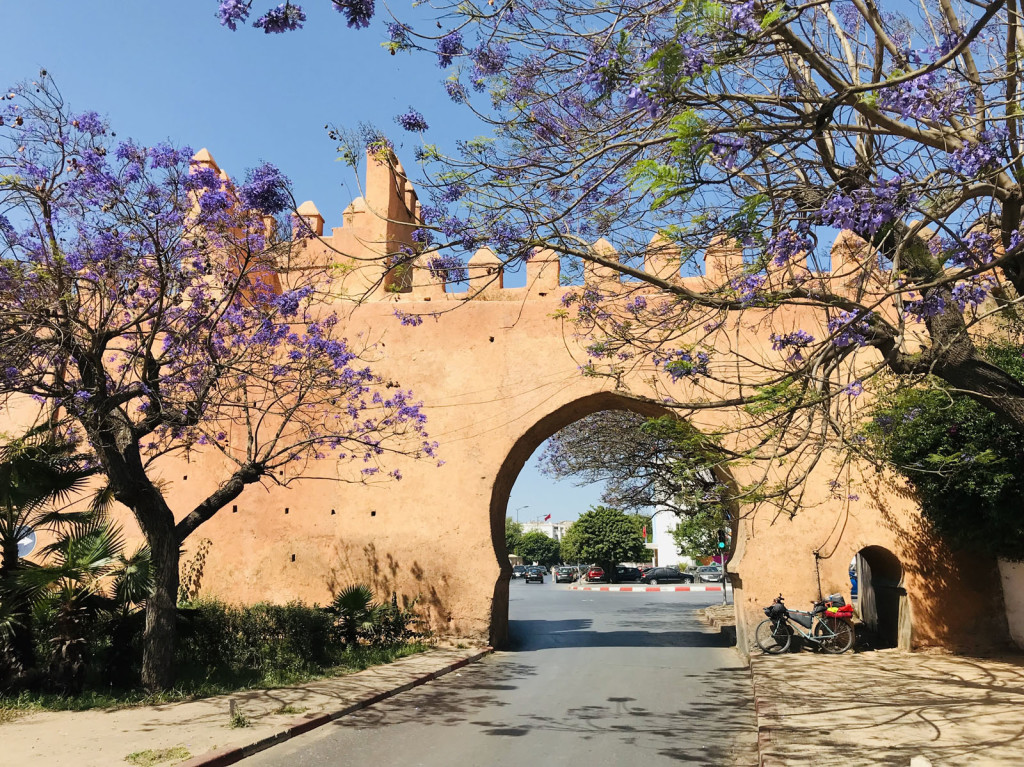
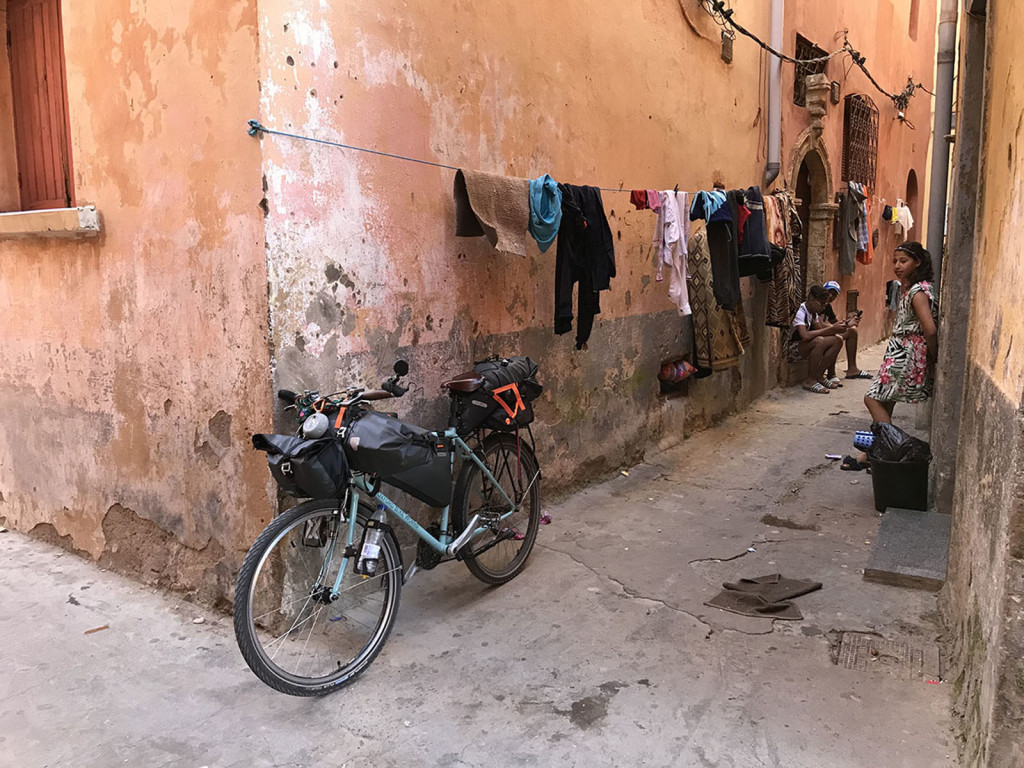
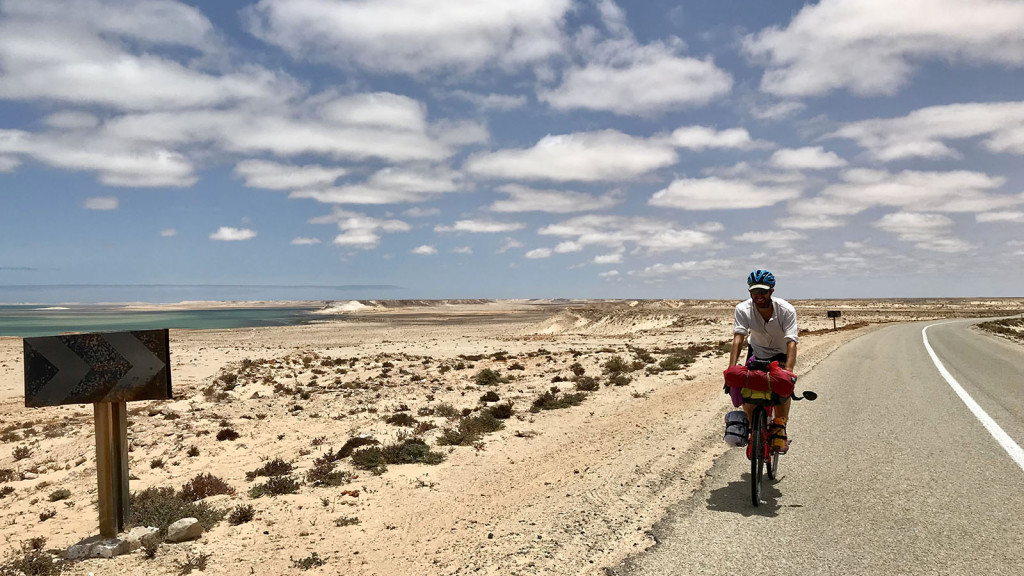
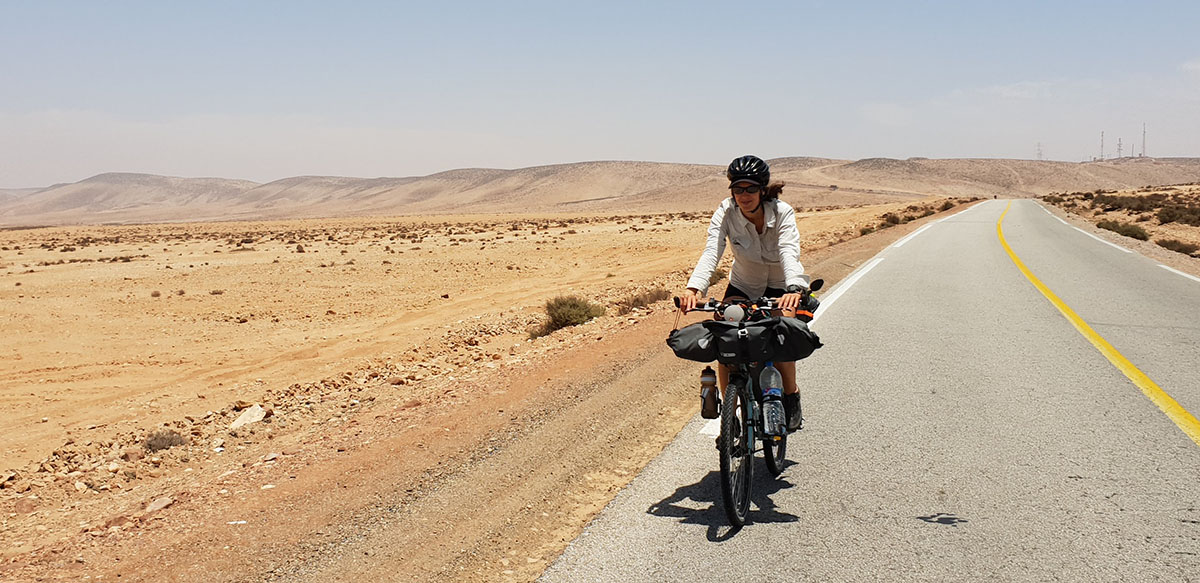
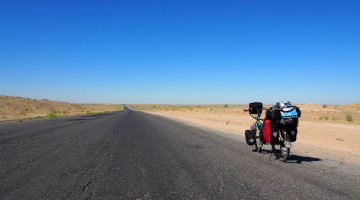
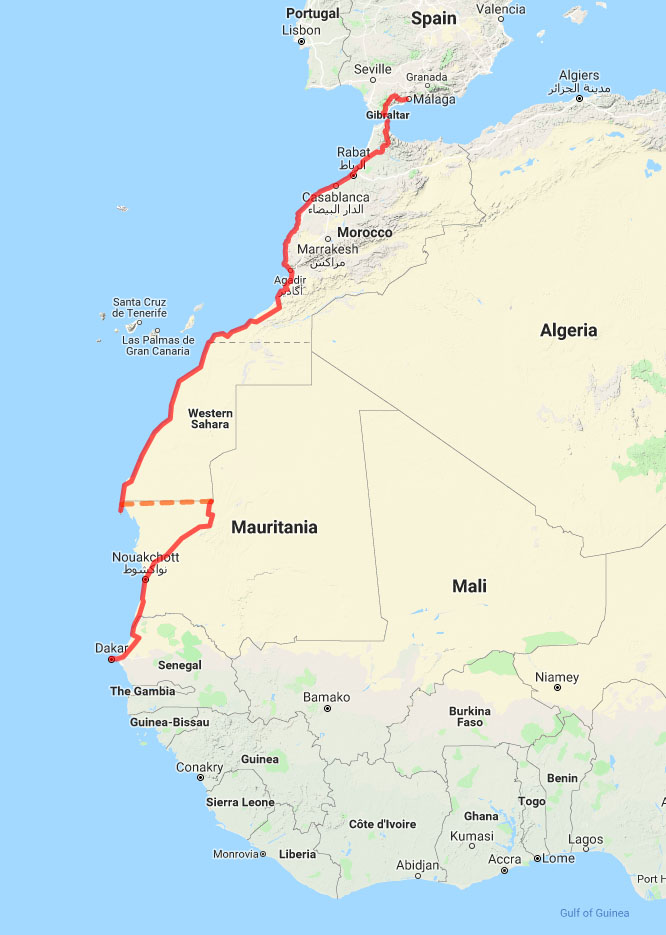
First, I flew with my bike to Málaga from where I cycled to the ferry port of Algeciras, via the scenic route through Ronda. After a quick hop across the Mediterranean, the ride continued in Ceuta, down the coast, through the blue houses of Chefchauen and the feet of the Rif Mountains. I landed in Rabat on Day 6, after 560 km, right on time to collect Pierrick who just finished a work project there.
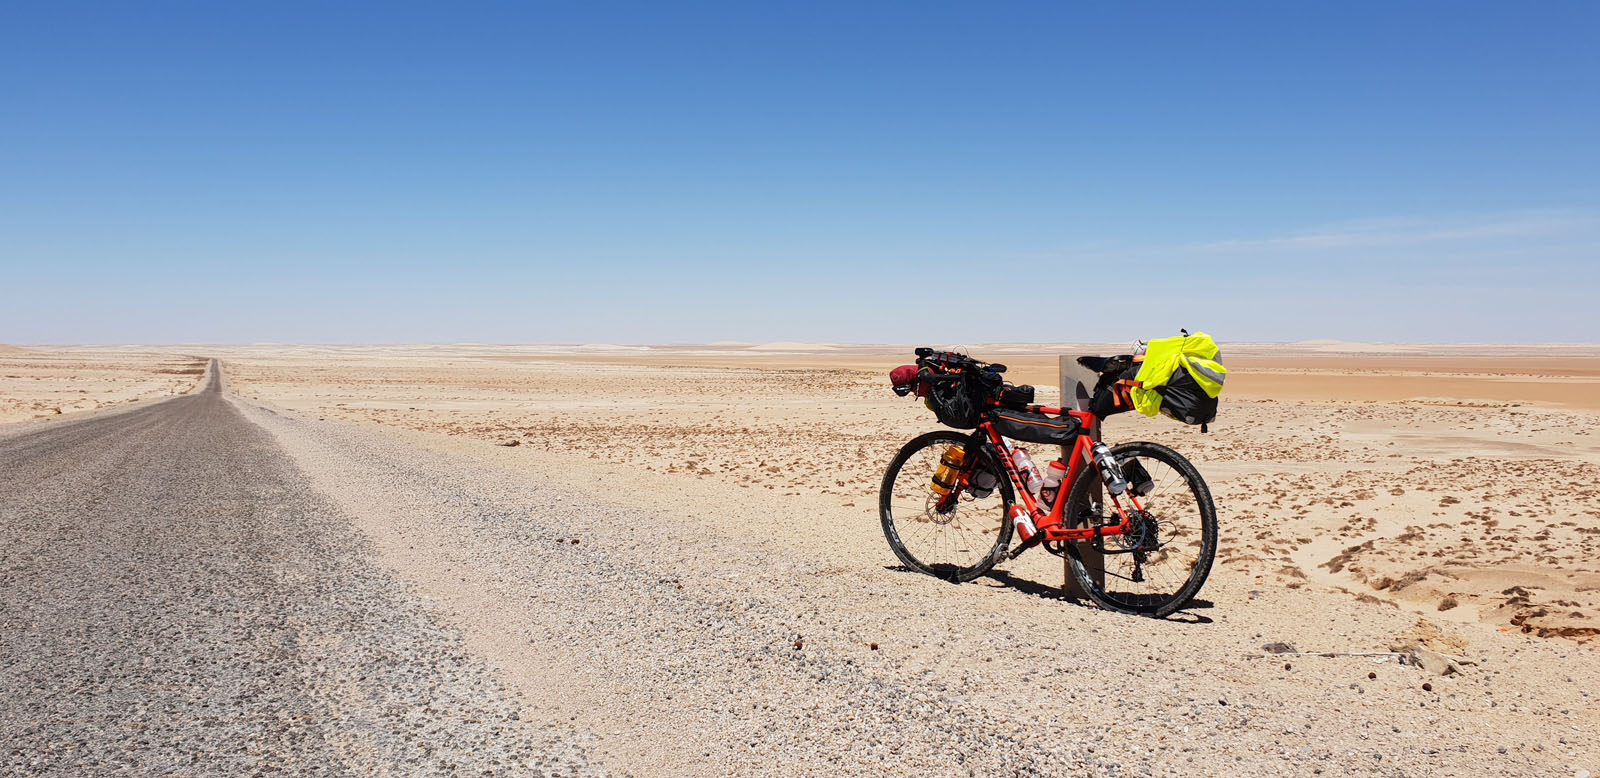
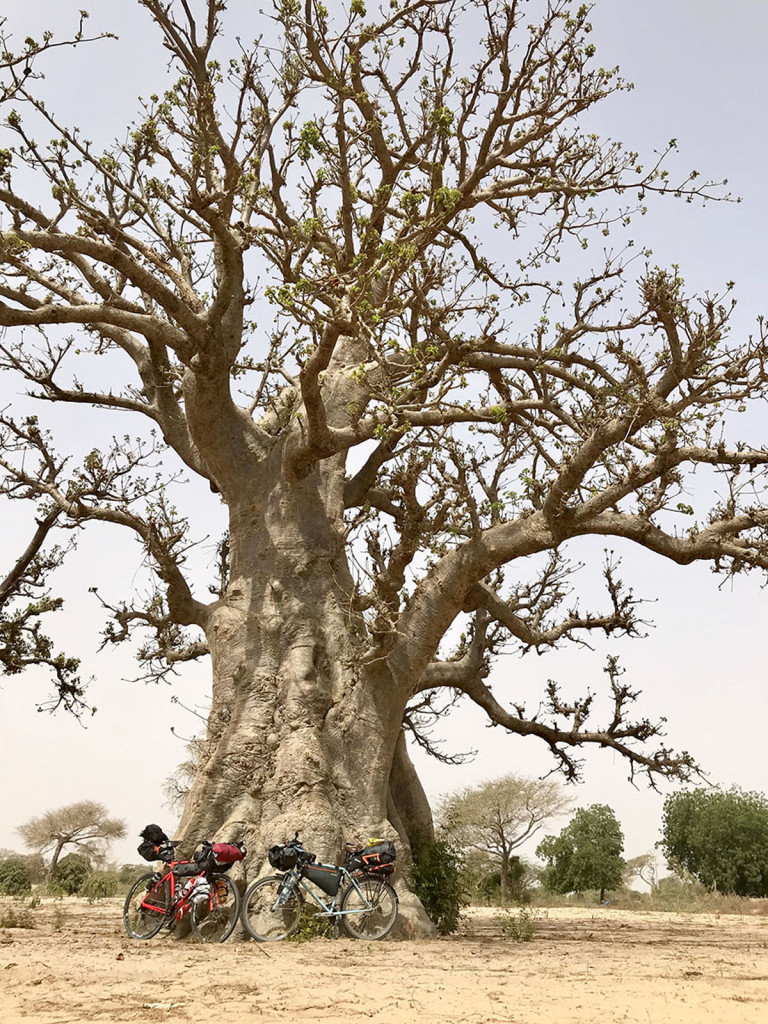
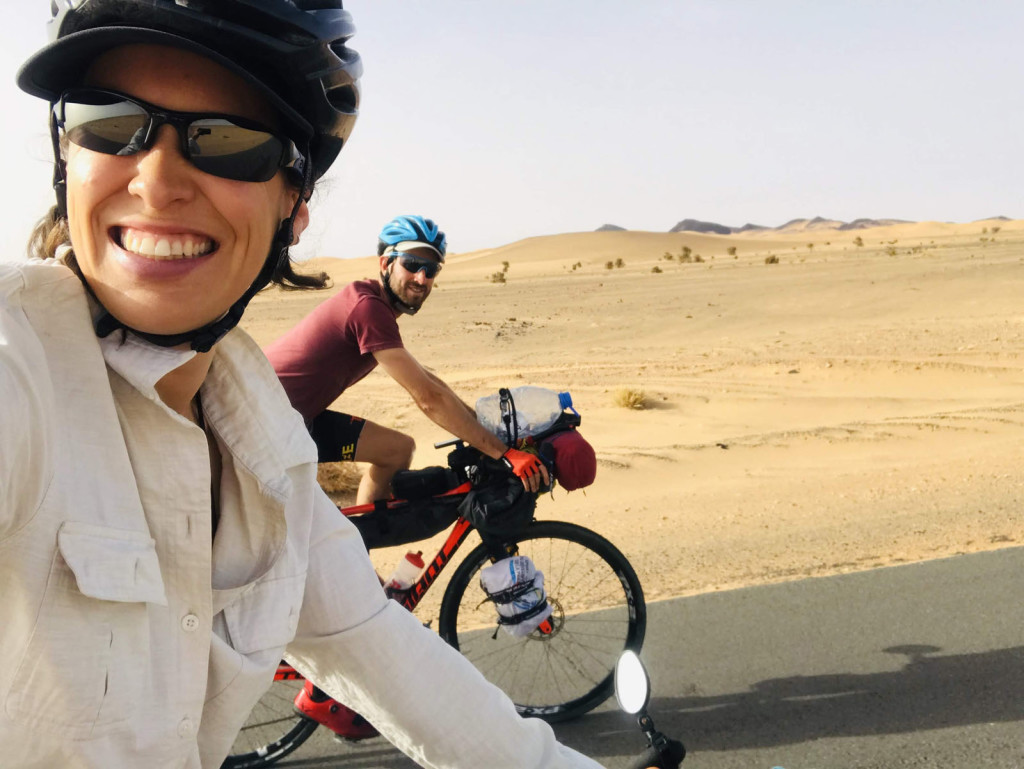
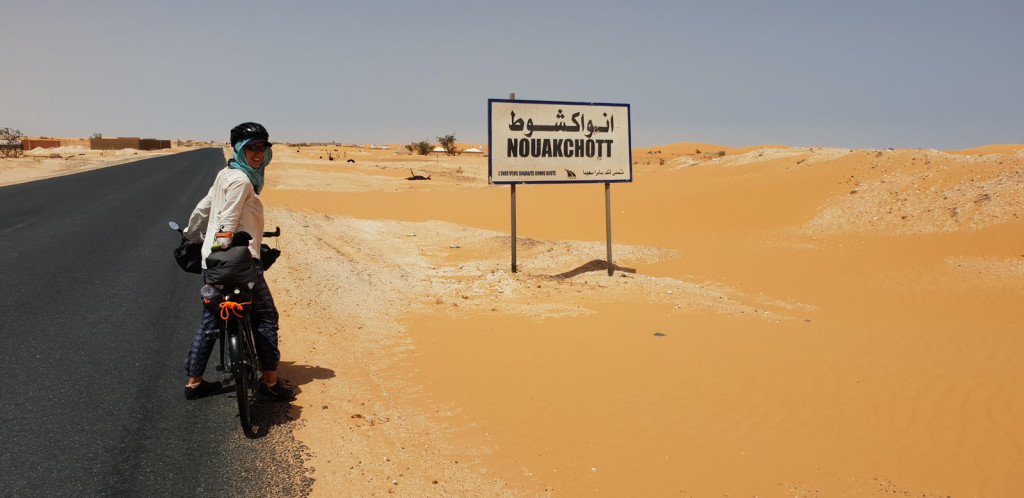
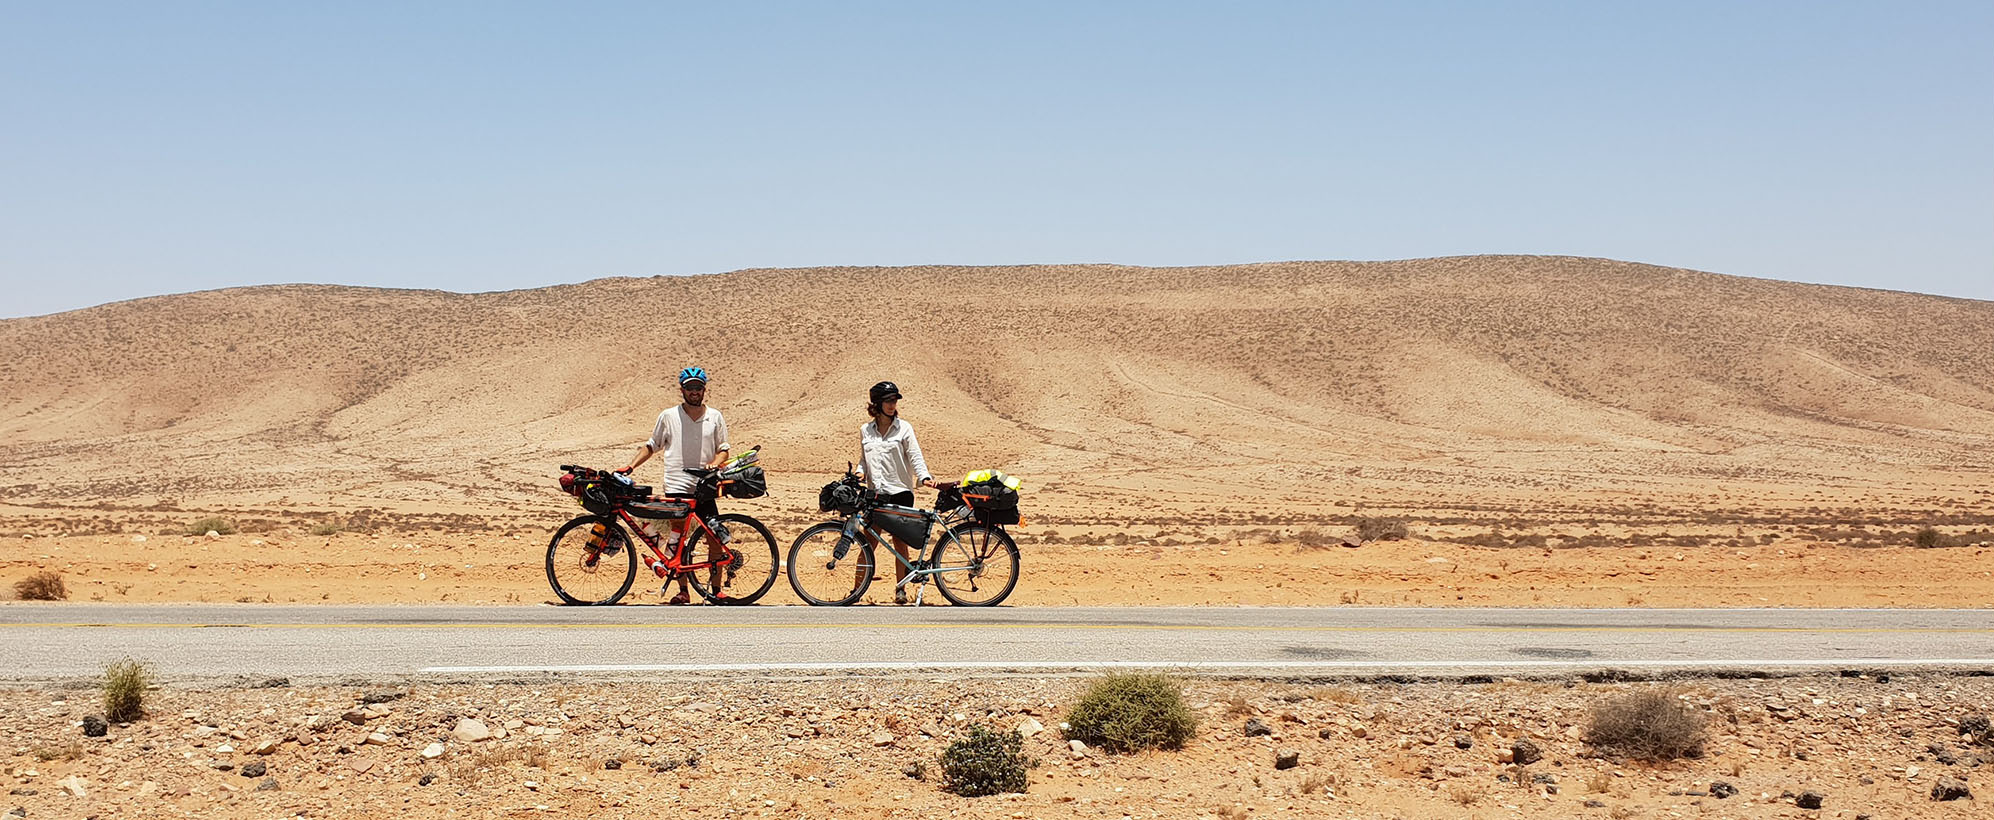
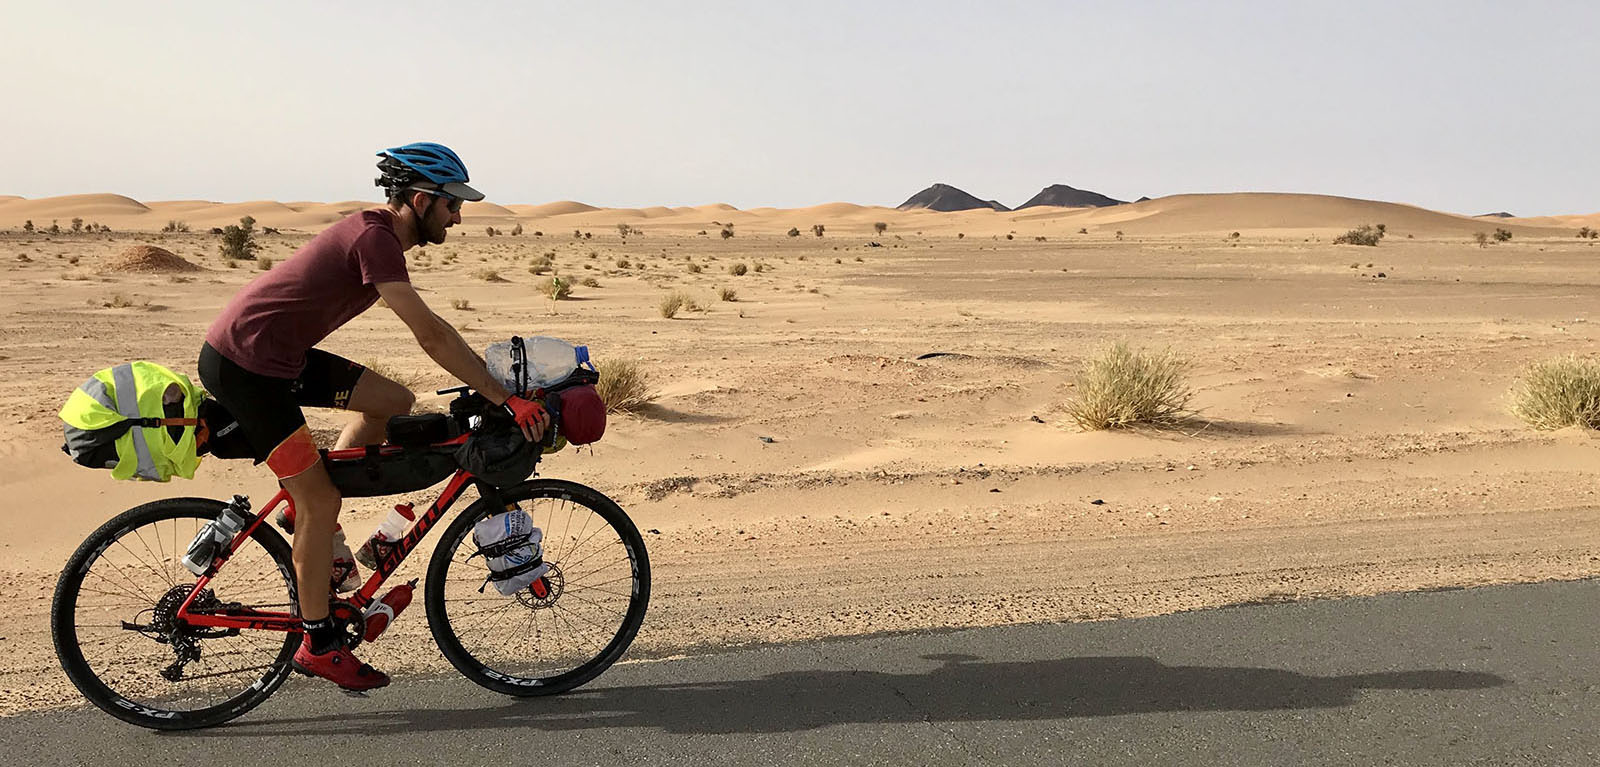
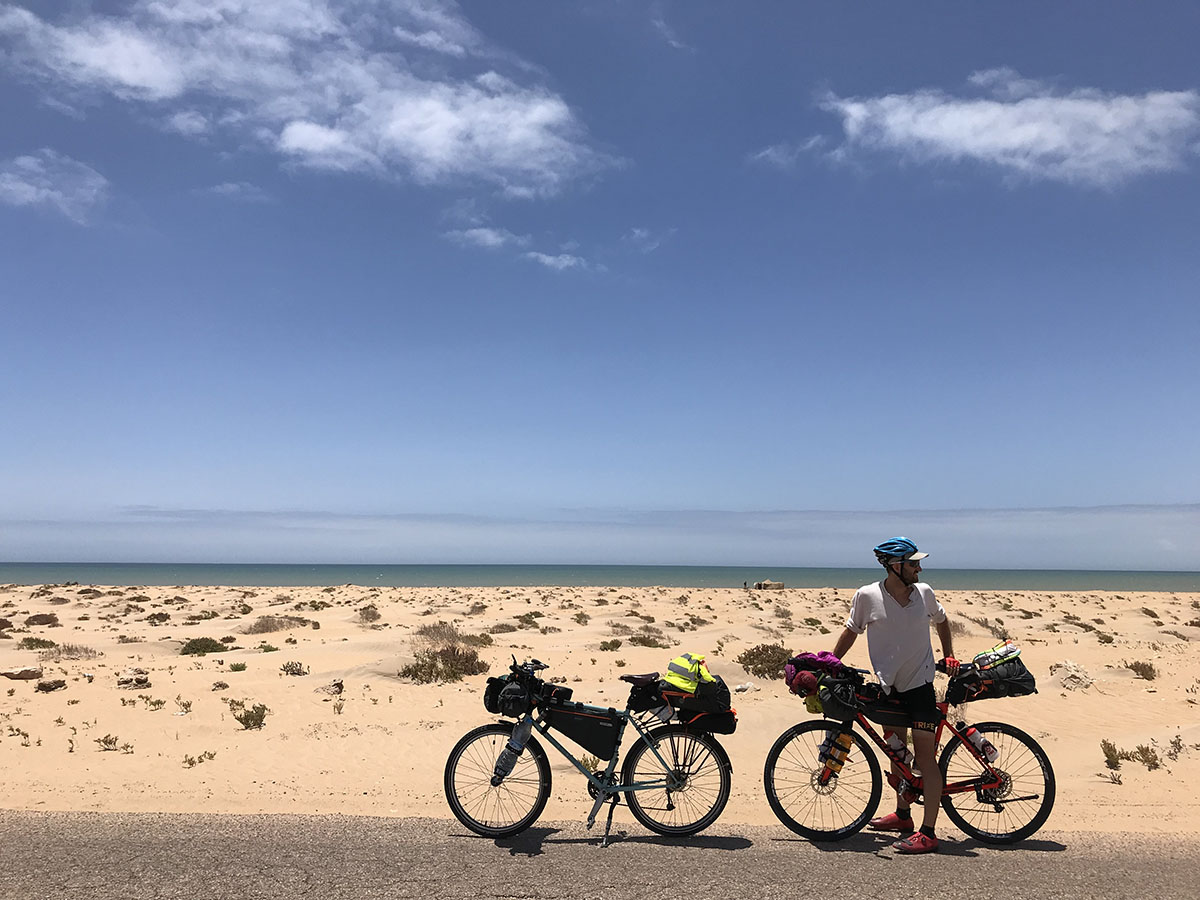
After a quick re-packing of the bike, we were on our way South again: down the coast of Morocco, the Western Sahara, through Mauritania and the north of Senegal.
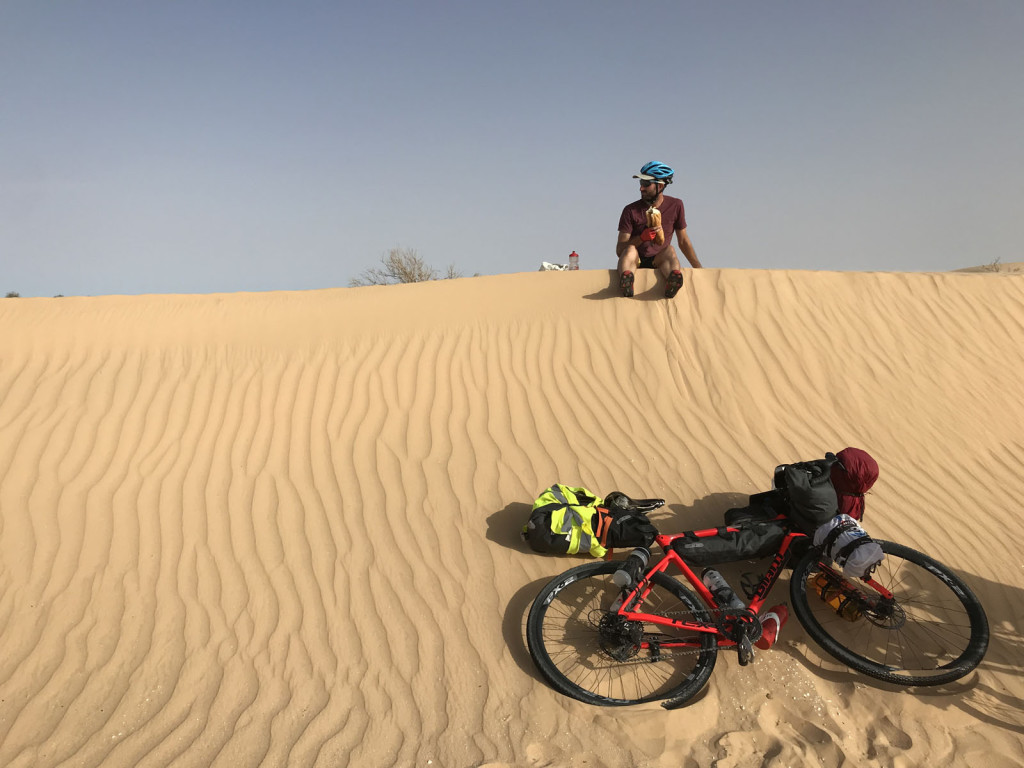
Cycling from Málaga to Dakar, we covered 3980 kilometers in 33 days (plus a few days off the bike). Only 3 days were spent off-road, on mixed quality gravel, the rest was on comfortable asphalt.
I knew this would be a speedy ride (for cycle touring standards, at least) and one we wouldn’t have to carry multiple days of food supplies on. I was curious about the bikepacking setup in general, but I mostly choose it for this ride to limit myself with the amount of stuff I can pack. In truth, I once again carried way too many things.
I did a thorough research online to see which bags to choose but I think my heart was set on the Ortlieb bags from the beginning. I’ve toured with my Ortlieb panniers and duffle bags for years and I was amazed by their quality; they withstood it all. The sun faded my once red back-roller plus panniers to pink, but they are still as strong as ever. As my online research largely confirmed my bias, I ordered the full set of bags and convinced Pierrick to do the same. The set cost 442 Euros on Bike24.com and was delivered for free.
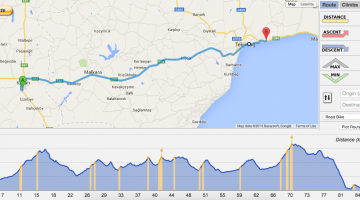
Route: Málaga to Dakar (Spain, Morocco, Western Sahara, Mauritania, Senegal)
Distance Cycled: 3875 km / 33 days
Road surface: 90% asphalt (often with a layer of sand) and 10% mixed quality gravel
Longest day: 260 km, Shortest day: 24 km
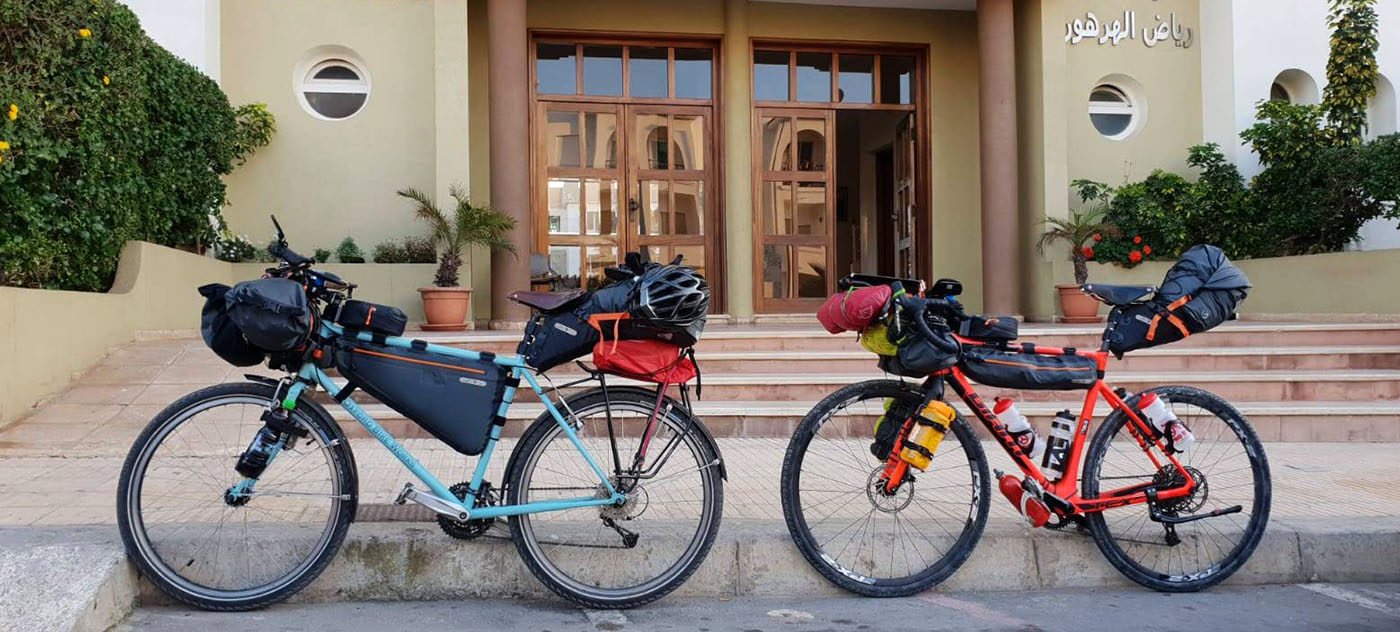
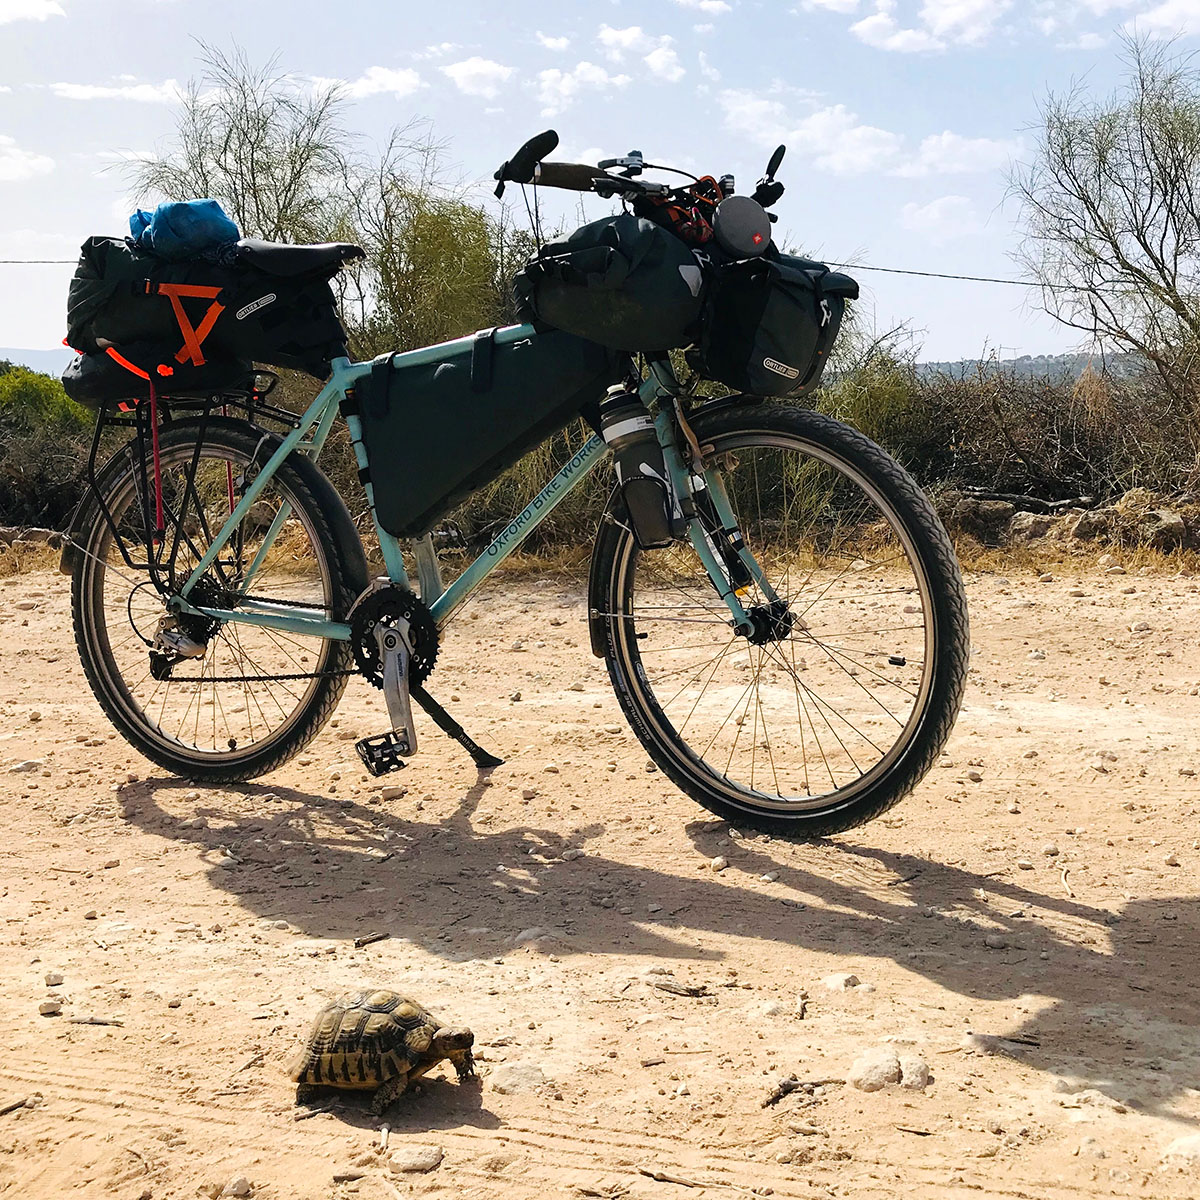
Bikes: Oxford Bikeworks Expedition Bike and Giant TCX Advanced, each weighting 30-35 kg incl. food and water
First Impressions | Ortlieb Bikepacking Bags review
Let’s start with the question above: why didn’t I know that I have to add frame protection tapes under the bag straps? The answer is simple: there was no communication about it from the manufacturer. Not on the Ortlieb website, not in their product videos, not in marketing communications (e.g. the nice official imagery of the bags).
The Ortlieb packs arrived nicely packaged in large, beautifully designed open cardboard boxes (well, at least they are recyclable). Along with the bags came the printed mounting instructions, that are very much like IKEA’s assembly guides. They are easy enough to understand and can easily be found online if you misplace one. But there was no mention of the risk they pose to the paint.
“We recommend you to fit solid frame-protecting tape under the attachment points, in order to protect your frame from damage.” – This information should be on any bagmakers website, who create equipment that gets attached to the frame (unlike the panniers, that attach to the rack), not just on Ortlieb’s. As a show of love and caring, I would also be happy to see some frame protectors included with at least the frame-pack.
Opening the bags, I was surprised not to receive a little patch-kit, for the larger bags at least. This was already on my kit-list for the trip and didn’t even occur to me that the bags would come without a little piece of extra fabric I can use for repair.
Providing a little patch would be just a small effort/investment on the manufacturer’s side, but would allow riders to fix their own kit on the go. As it doesn’t require shipping back-and-forth, it’s not only the fastest solution for the user but probably the most environmentally friendly one.
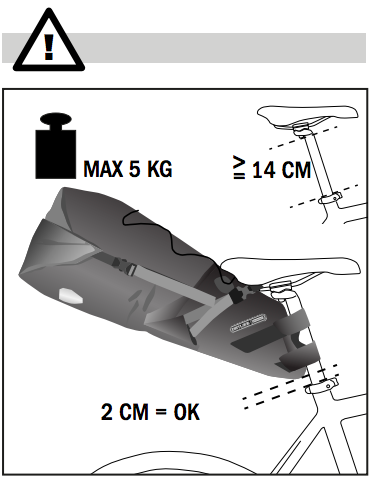
My next surprise came when I mounted the bags on Libby. All was well and I was truly excited about the process… until I got to the seat-pack. First I disregarded the instruction about the seatpost-length, but it all made sense when I realised that I cannot comfortably fit this bag under my seat. I only had 12 cm of clearance.
I think it should be clearly communicated in the product description on every distributor’s site that 14 cm of seatpost length is required for securely fitting the bag. That way it will hold firm and not rub against the frame in the bottom.
Of course, I managed to fit the bag, due to the fact that I had a rack loaded with other items and a bungee-chord running around them which held everything in place.
Apart from the above annoyances, my general feeling was exhilaration. There’s a whole boxful of shiny new kit in my room, it’s beautiful and well made with much attention to detail and the fact that it is here means that is a new adventure coming!
Frame-Pack | Ortlieb Bikepacking Bags review
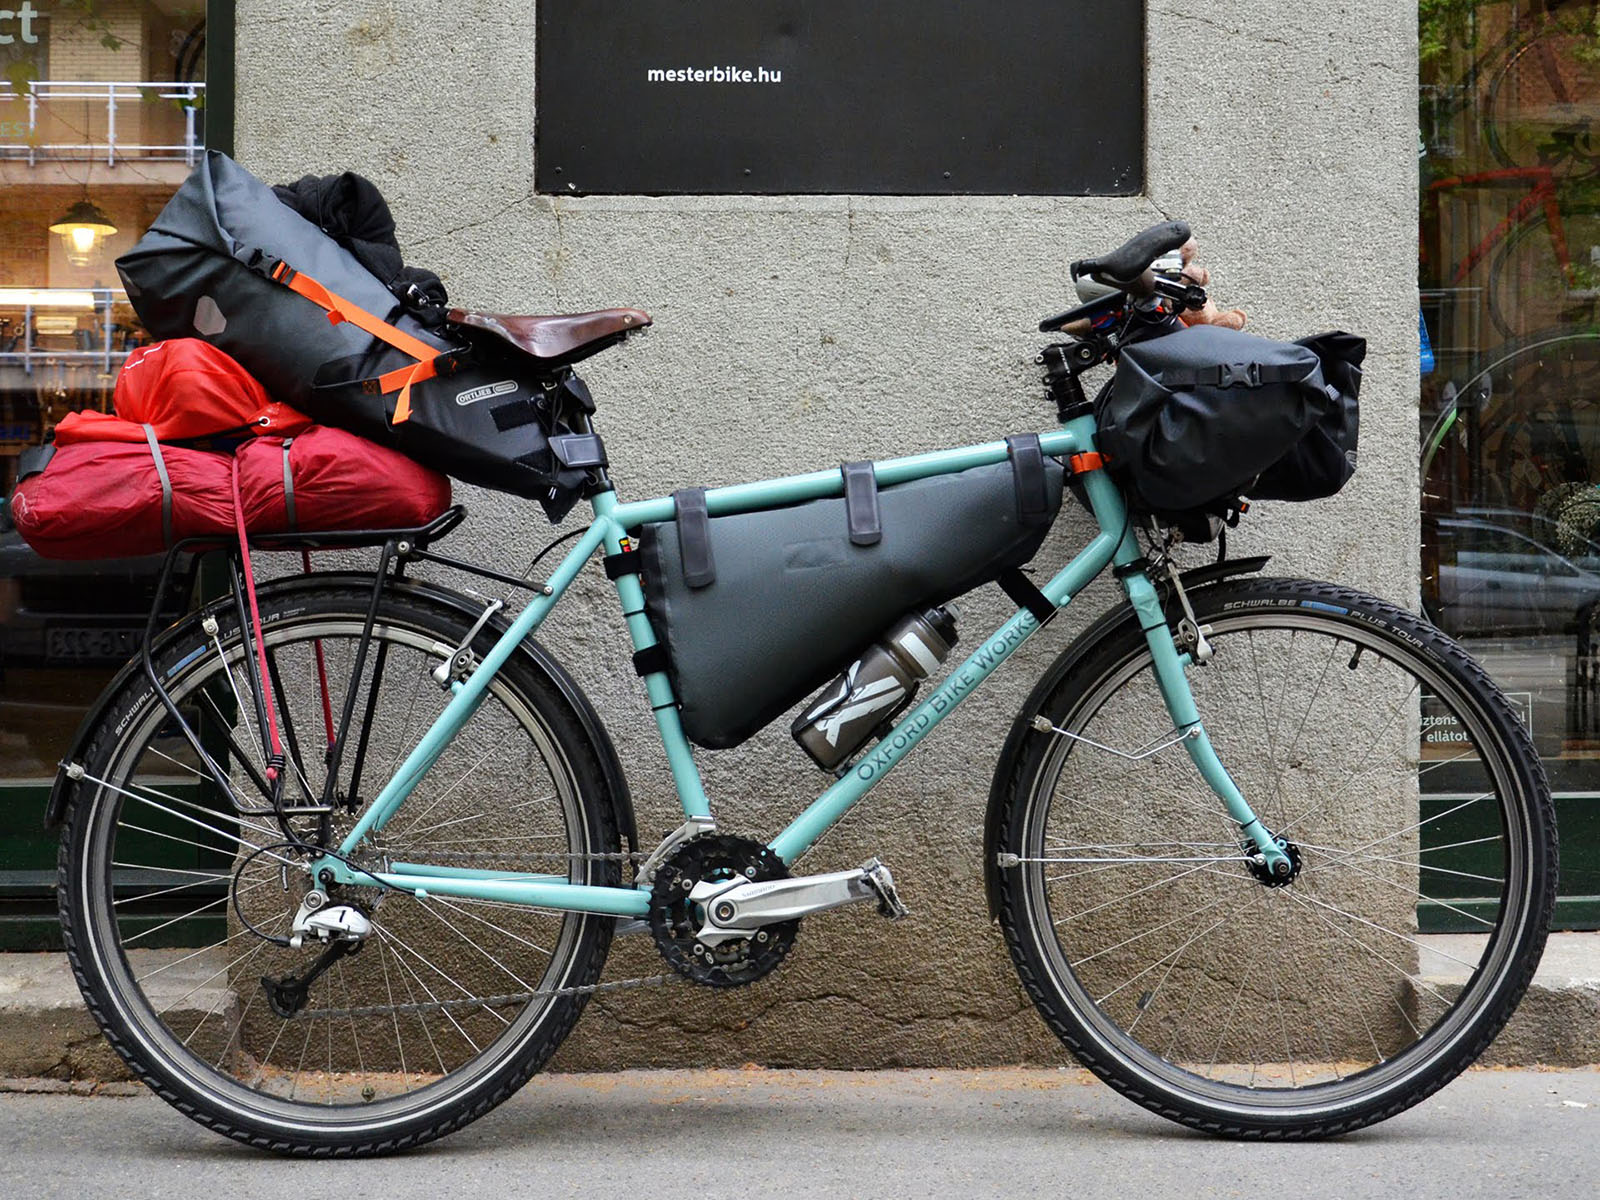
I LOVE the Ortlieb Frame-Pack! It fits my frame perfectly, the fabric is sturdy and it looks cool. The zipper needs a bit of force to open and close, but with a bit of practice, it can be done while riding. I like the fact that there are many attachment points. I used extra zip-locks on the seat- and down-tubes to keep it firmly fixed. No issues whatsoever and it swallows an amazing amount of stuff, without protruding to the side and disturbing my ride. Due to the long zip, it’s also quite accessible.
We weren’t able to fit the full-frame pack on Pierrick’s frame, as this bag requires the top-tube and the seat-tube to be at (almost) 90 degrees. This is something that is not made clear in the product description and left us feeling very frustrated. We ended up returning the pack and ordering the toptube farme-pack which we were able to squeeze in, though it was far from perfect. But, if used with the correct frame, the toptube frame-pack is just as good as its larger sister, well-designed and sturdy. It’s also surprisingly spacious and very handy to use.
The only thing I would change is the design on the right side of the bag, which is non-existent. I’m being a girl, but I really miss a touch of colour here, something the orange zipper gives you on the left side. I noticed that all the images where my bike is photographed from the right (which is preferable because of the drivetrain), the frame-pack looks very dull, just a gray mass in the middle.
Link to the Ortlieb Frame-Pack and the Ortlieb Toptube Frame-pack, to the mounting manual and the datasheet.
Would I buy this again?
Yes, absolutely. Both of them.
Will I use it in the future?
Definitely.
Before you buy…
Make sure to check the sizing and angles of your frame triangle against the exact dimensions of the bag!
Cockpit-Pack | Ortlieb Bikepacking Bags review
This one I have mixed feelings about. The size is good and the material is sturdy enough, just like the frame bag, but I’m very unhappy with the shape and the attachment system.
Ease of access
While it’s possible to open the bag while riding, it’s not easy and closing it is almost impossible. Easy access (to your snacks and such) is exactly what the key function of a cockpit-bag should be. My key issues with this piece of kit are the following:
- The zipper only runs around half of the bag which means that you can only open it halfway. This makes it difficult to fish out anything from the rear of the bag.
- The zipper runs at a half-circle which means that you have to hold the bag with one hand while applying force at the correct angle on the zipper as you open and close it. Trying to drag it open with one hand puts needless strain on the zipper and the material around it. We had issues with one of our zipper which is not very strong to start with.
Fastening
I found the attachment system very unstable. The bag constantly moves a bit left and right on the frame which makes opening and closing even more difficult. There are other cockpit bags out there with better systems.
Materials
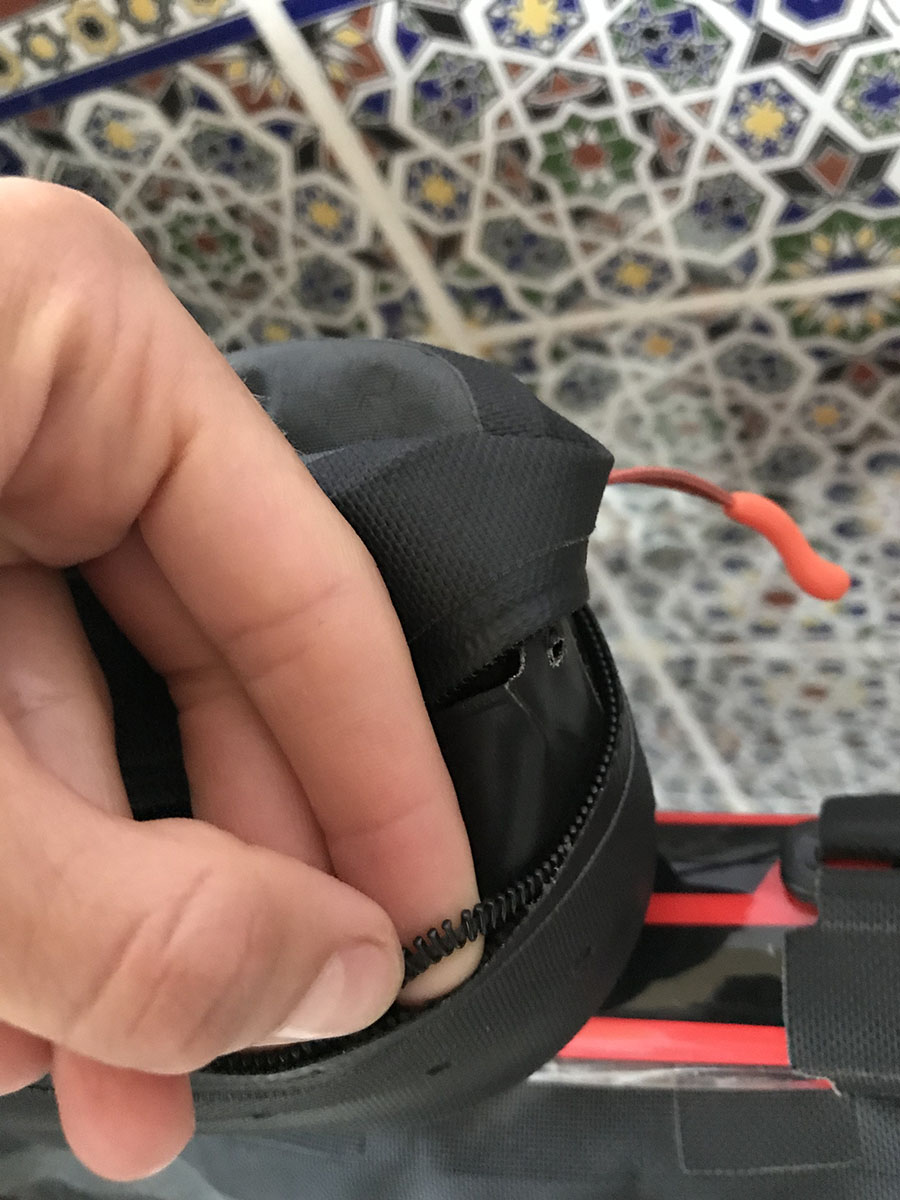
The fabric is great and it looks neat with the rest of the set. The zipper we had issues with. I’m not sure if this was one faulty zipper, or it’s a general weakness, but one of our zips simply came apart on the first week at the plastic part. Ortlieb kindly replaced it, but we had to wait until we were back in Europe to sort it out.
Link to the Ortlieb Cockpit-Pack, to the mounting manual and the datasheet.
Would I buy this again?
No. Of course, it’s nice that it fits with the other bags in terms of colour and materials, but there are many better-designed cockpit bags out there that fit better on the frame and easier to operate.
Will I use it in the future?
I’m undecided on this one. As it’s still in good condition, with only 6 weeks of use, I’ll probably try to sell it. Alternatively, I might try to attach some rubber holders to keep it in place on the frame. It’s not a bad piece of equipment… but could be much better.
Before you buy…
Make sure that the attachment straps will not interfere with the frame bag / top tube bag straps – if you’re planning to use any other than the Ortlieb products. Ortlieb’s bags are designed to fit well together, but we had trouble mounting this with some other brands.
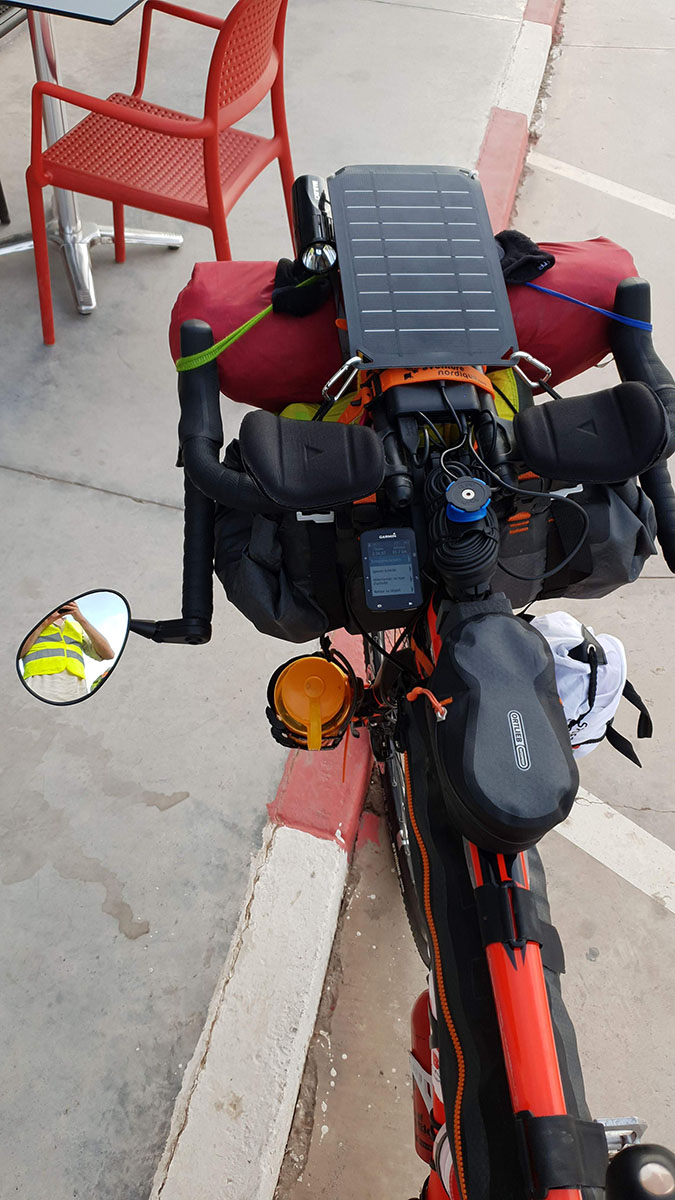
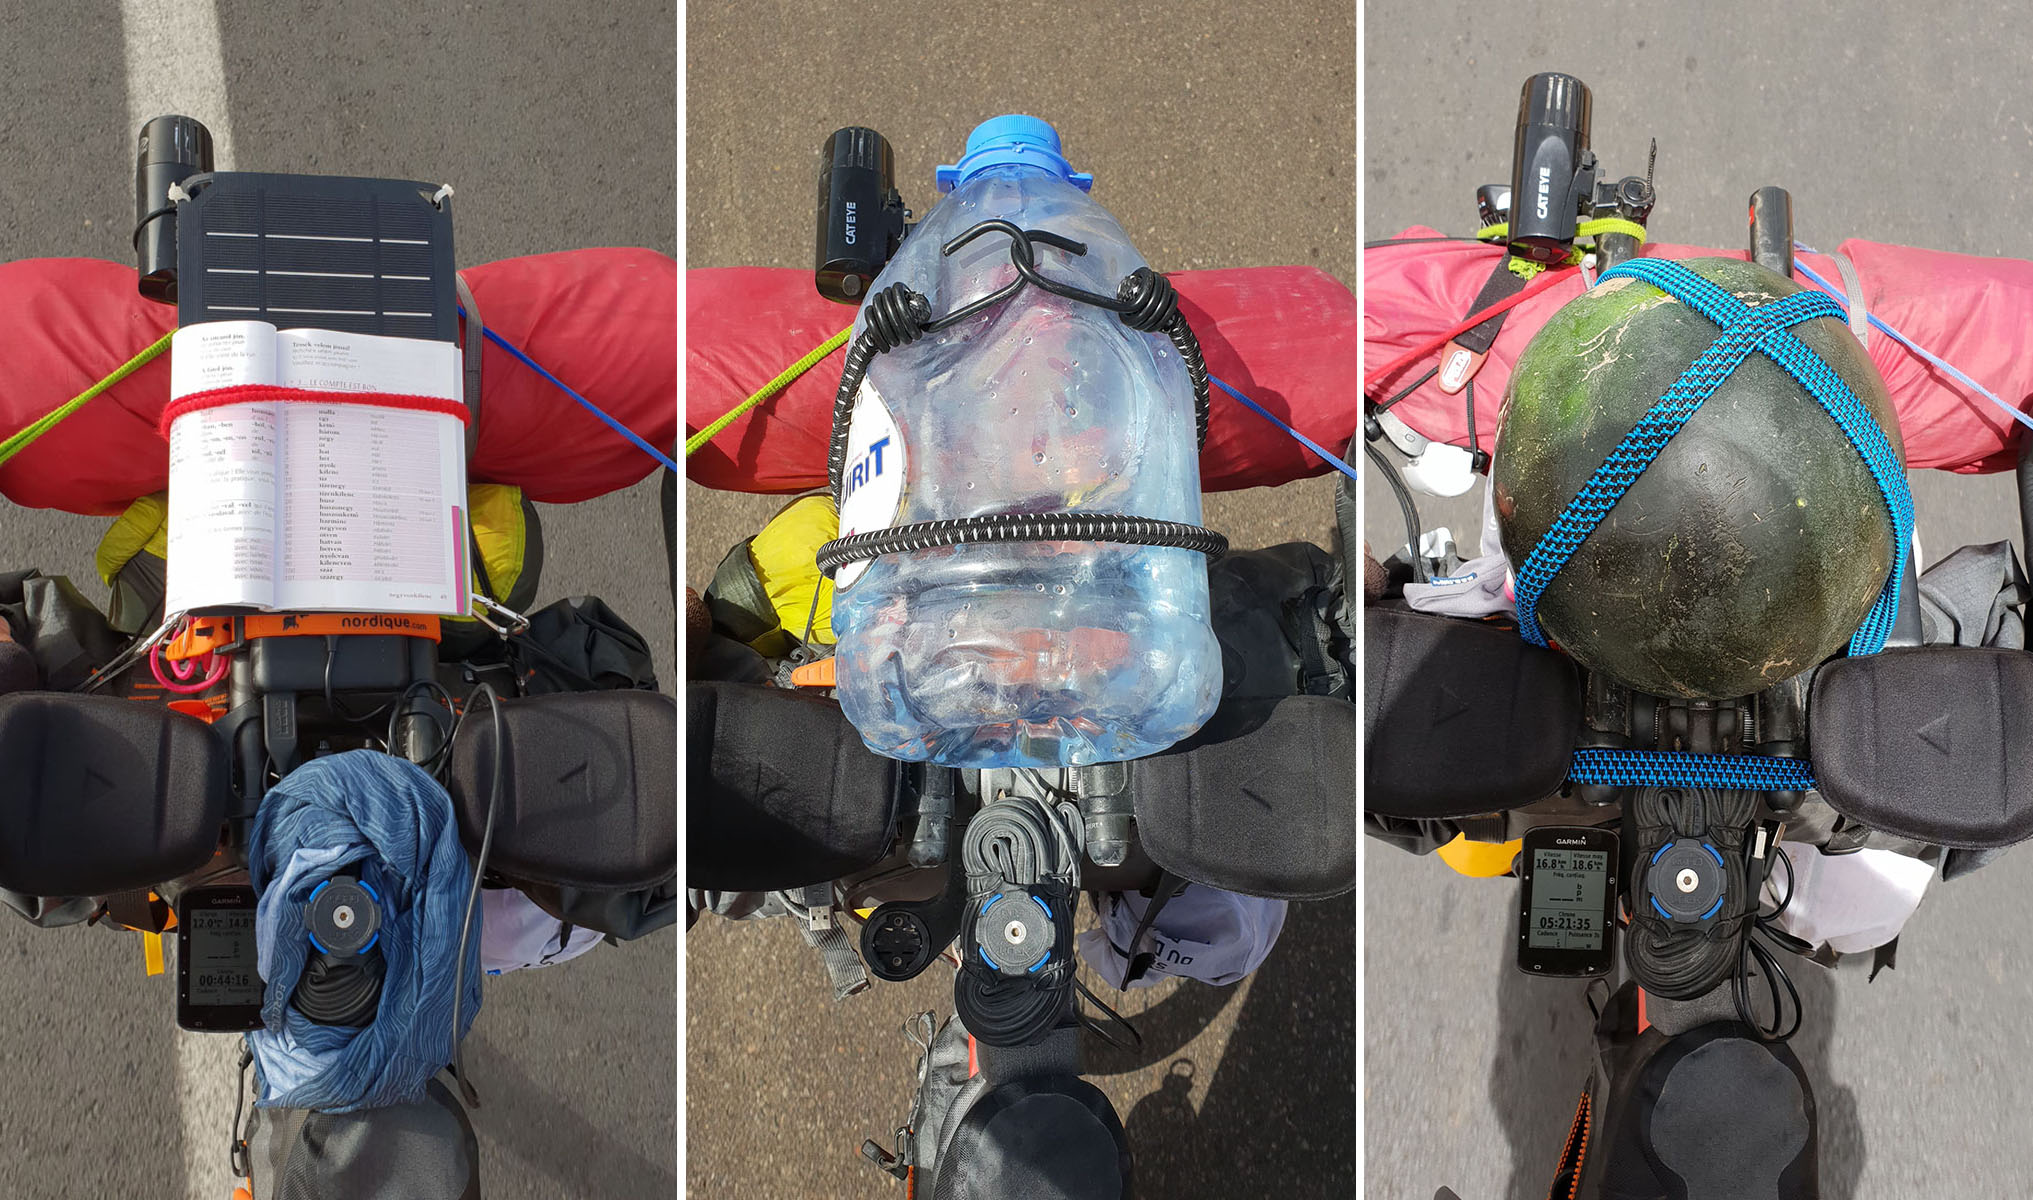
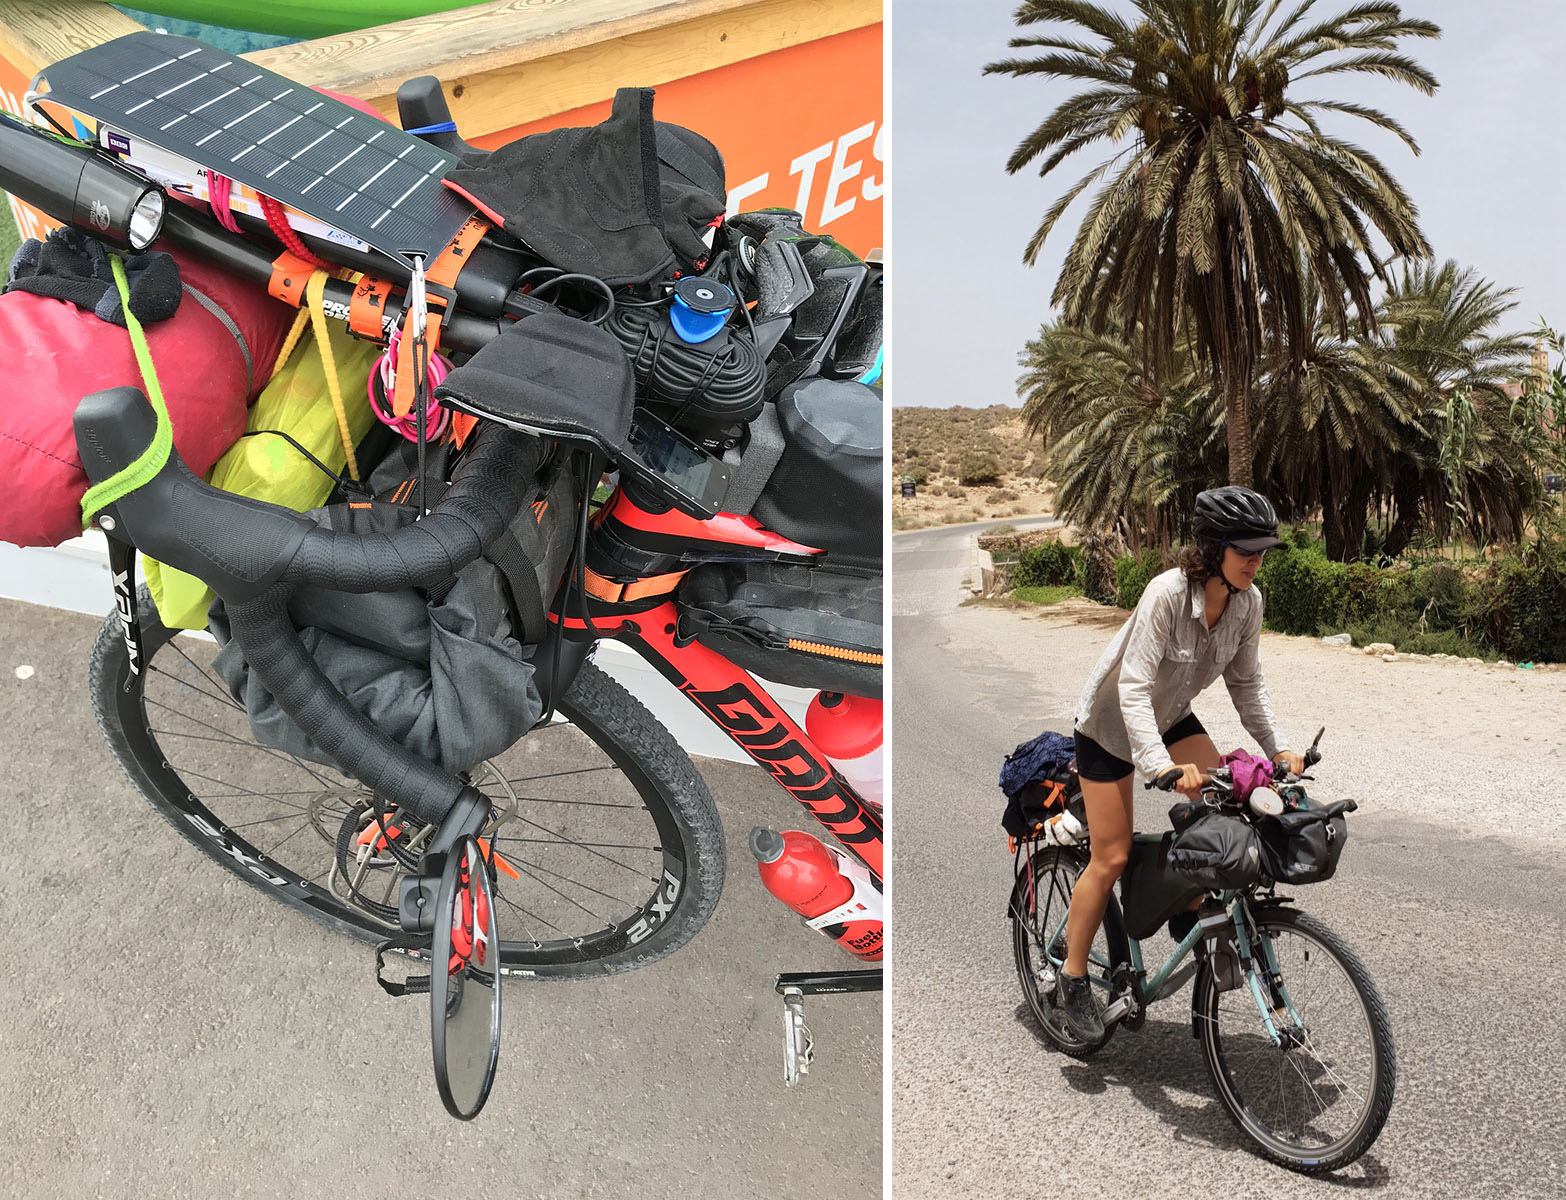
Much more useful than the cockpit-pack were the Profile Design aerobars Pierrick decided to keep on his bike. The aggressive cycling position it offered was secondary to its usefulness in carrying gear: a 5L waterbottle, watermelon, study materials… It was also these bars we attached the tent and our main food-bag to, so it often carried 10 kg weight. We were very impressed with how it held up and will certainly keep it for the next trip.
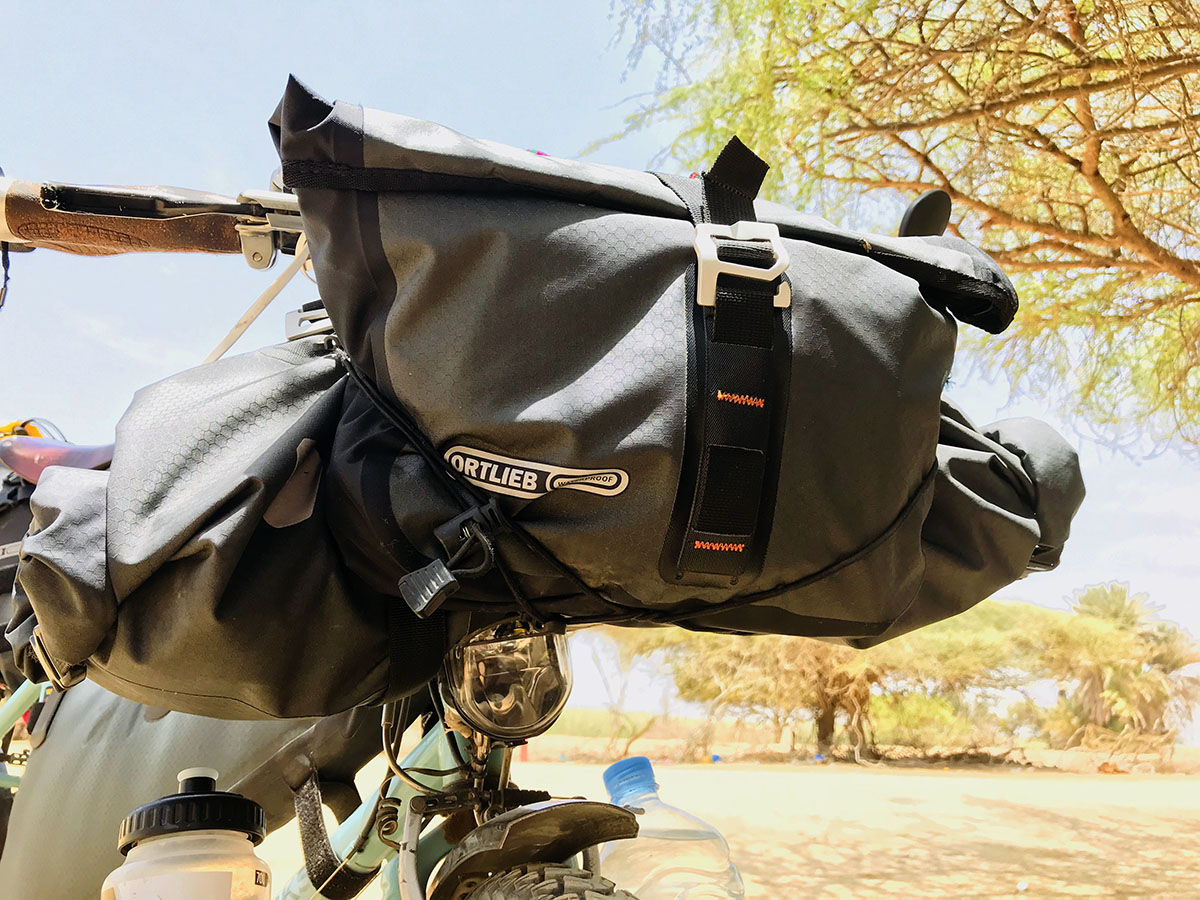
Handlebar-Pack | Ortlieb Bikepacking Bags review
I start by saying that this bag has grown on me over time, despite the multiple issues I had with it and the time it took me to organize its content correctly.
We both bought the larger, 15L handlebar-packs. Mine got fitted to straight handlebars, Pierrick squeezed his between the drop-bars of the Giant, using only half of the otherwise available volume.
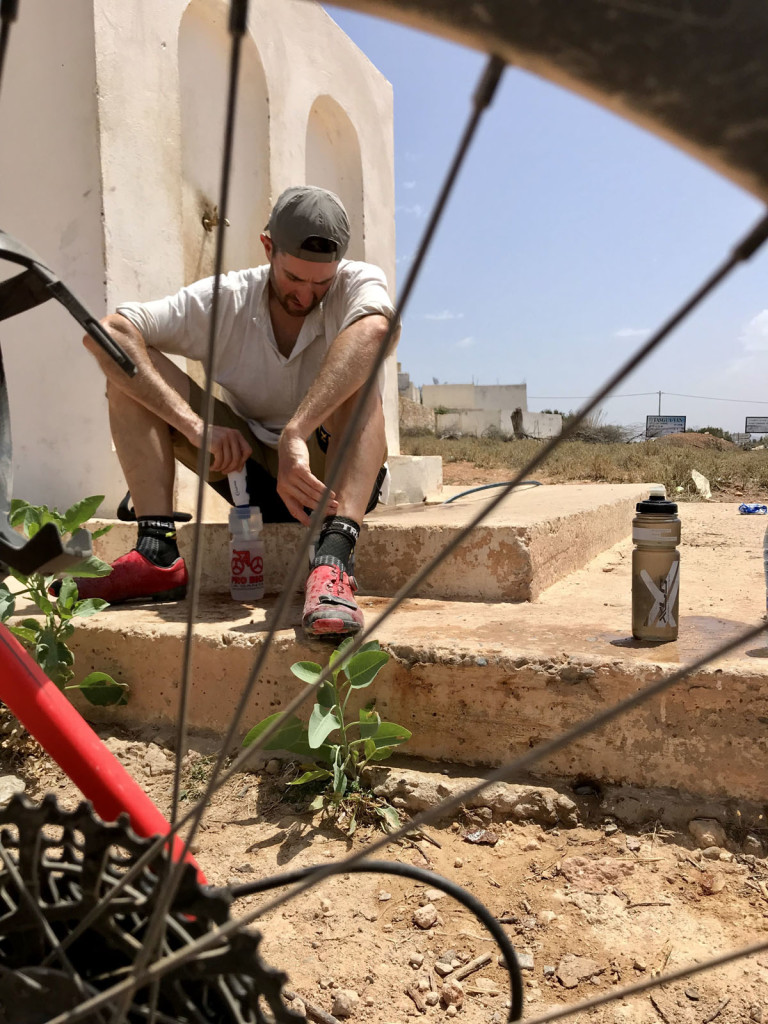
Firstly, though, one mistake on my side. While I rigorously taped the frame under the frame-pack straps, I forgot about the fork and headtube. This is where the handlebar-pack attaches at the bottom. I realised my mistake after my flight when I put together the bike in Málaga. Being a bit lazy to go to a bike shop, I reckoned the electric tape I have in my toolbag will do the job. I applied that in generous layers on the fork, but unlike the real frame protectors, this did not withstand the elements.
Tape your frames and forks, kids!
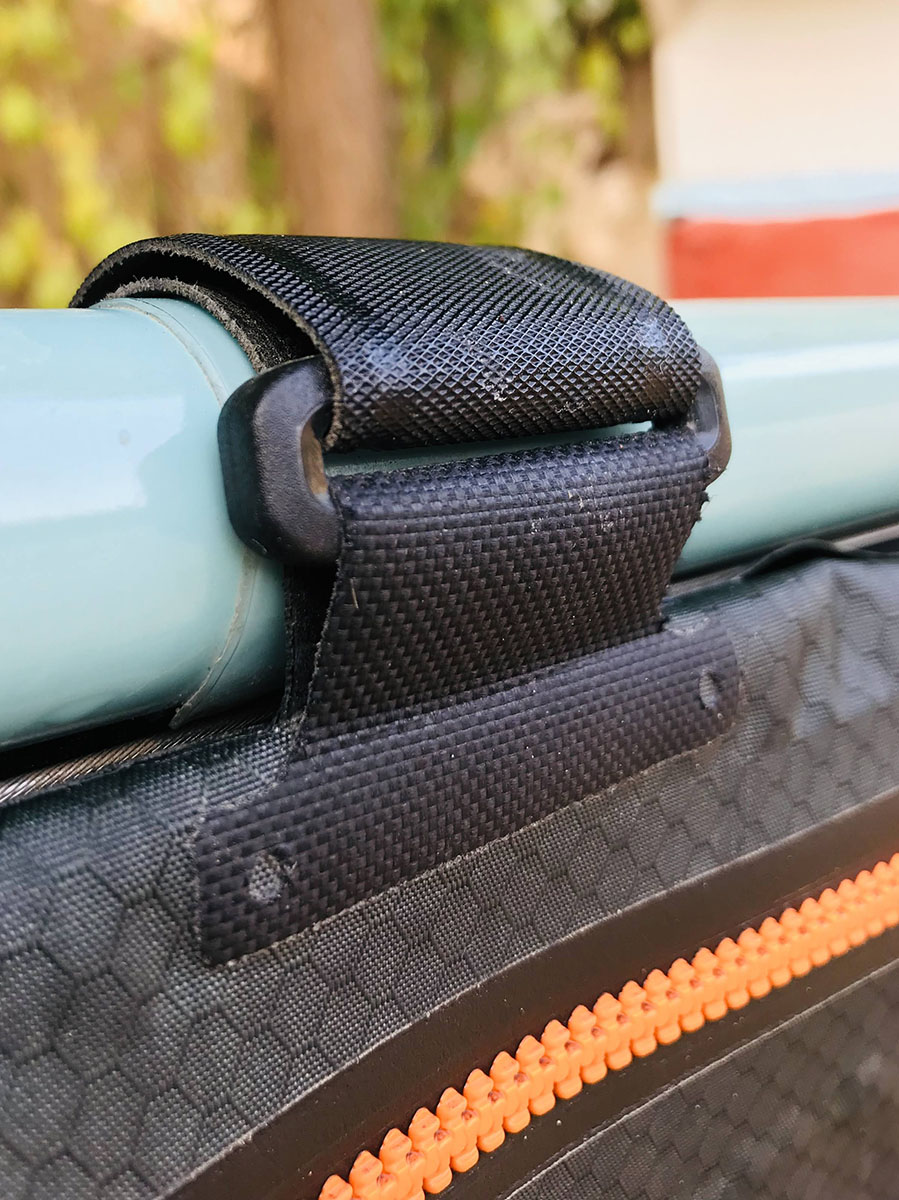
The pictures of my fork and bag were taken after 4 weeks and only 2000 km of riding. After an exhilarating but very dirty ride on Mauritania’s famous SNIM Iron Ore Train, we took a rest day and decided to strip down and properly clean the bikes and bags. This is when I noticed the damage. The fact, that I just replaced my frame and fork before the start of this trip did nothing to lighten my mood.
Ease of access
Access to the bag is easy when you have a straight handlebar, and it’s a nightmare when you have drop-bars. Hence, on Pierrick’s bike we stored here items we would only need at night and did not open the bag during the day. My handlebar-pack had some seldom-used items in the middle, and from the two sides, I added our cooking pot-set and food items. In the two ends of the bag, it was always a supply of snacks, fresh fruit, and bread. I enjoyed both the easy access when stopping and how the pack kept fresh our flatbreads.
I found it handy to keep every item in smaller sacks inside the handlebar pack, both to protect the pack and to make re-packing easier by having already grouped the items.
Fastening
Fastening the bag to your handlebars can be tricky, especially if your cabling is in the way, as in my case. It took some effort to attach the bag in the correct position, but once done, it stayed on our bikes for the whole of the trip, only needing a couple of re-fastenings. Unlike the seat-pack, that can be easily removed and re-attached in a few seconds, this bag would likely stay on your bike all the time. The few occasions we used our bike without the load (i.e. to sightsee around a city), I folded the empty bag on itself and attached with the straps. It was no issue.
When the packs arrived, it came with a set of foam spacers, designed to help you get the correct distance from your headtube and handlebars. I had two issues with these:
The foam pieces are flat, and they supposed to be attached between two round items (the bag and the bars).
I received one foam piece with two holes in to, just like it’s pictured in the manual, and four pieces with only one hole in it. These were unusable as they were, so I eventually cut some holes in them with a tape cutter. Still, it was not easy to use them.
Material
After I figured out the packing (which took about 3 weeks), I really started to like this bag and I would recommend it, if not for the fabric, which feels much thinner than the frame-packs material (though, based on the datasheet, it supposed to be the same). After three-four weeks of use, holes started pupping up on my bag. In most cases, this was due to the rubbing at attachment points, where the material simply gave in with the constant movement. One small hole I couldn’t identify where it came from.
After touring with my Ortlieb panniers for years, using them as kick-stand, pushing them against rock walls, having a few accidents… and all this without any rips or holes, I was shocked. We’ve barely got on the road, and apart from my bike, nothing touched this bag. I came to the conclusion, that to spare weight and have a sexy looking fabric, the durability must have been sacrificed – which is great if you want to look the part on a weekend ride with your mates, but really sucks when you’re in the middle of Mauritania and weeks of riding away from a shop with suitable waterproof fixing kit.
Once again, I felt a fair bit of annoyance for not having been given a patch-kit with the bags.
Link to the Ortlieb Handlebar-Pack, to the mounting manual and the datasheet.
Would I buy this again?
No, because of the fragility of the bag and the difficult attachment. For me, the main reason for choosing Ortlieb is to have my peace of mind when it comes to quality. I don’t mind spending a little extra on my kit if that means that I can focus on my adventure and not on equipment issues.
Will I use it in the future?
I’m undecided. The bag had been mended by Ortlieb, but as I couldn’t sell it at a good price, I’ll probably keep it and use it for shorter rides and carrying a patch-kit. Apart from the fabric, I do like this bag.
Before you buy…
If you decide to buy with this bag, which is still a valid choice, buy a patch-kit with it and, most importantly, check your bike every few days to for possible rubbing-points. I wish I did this, I likely could have prevented my injuries.
-
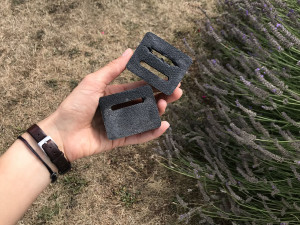
- Home-cut holes in the separators…
-
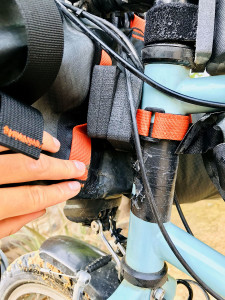
- The constant movement, as the bag touched the fork, destroyed the fabric
-
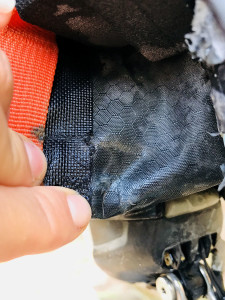
- The constant movement, as the bag touched the fork, destroyed the fabric
-

- Both the electric tape and the paint was rubbed of off my fork…
-
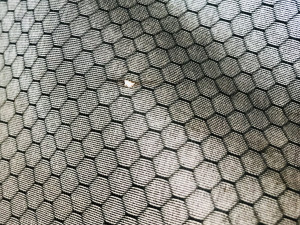
- Small hole in the fabric…
Accessory-Pack | Ortlieb Bikepacking Bags review
This bag really is a perfect addition to the handlebar-pack. It attaches well and with ease and provides a much-needed easily removable and easy-access storage for your valuables.
Ease of access
It’s not nearly as good as Ortlieb’s traditional solution, the Ultimate range, but with a bit of practice, it can be opened and closed on the go. I also like the fact that you have a hip-strap to go with it, though I haven’t tried to use this yet.
Fastening
It takes a minute or two to attach and remove the bag, which I found annoying at first, being used to the Ultimate’s click-system, but it’s possible to get used to it. Also, you would only remove this bag when leaving your bike somewhere (e.g. going into a shop/cafe). Considering the intended use of the bikepacking setup, which is off-road in the hills, you are unlikely to remove this multiple times a day.
This, however, leads us to my main annoyance. While the main fastenings of the handlebar-pack and the seat-pack use a safety lock system (you fasten the orange strap, then secure with a plastic clip), the accessory pack is attached with a simple alloy hook, and the adjustable (black) strap of the handlebar-pack that runs through it. I had no problem while on the road, however, once we got onto shaky gravel, the shaking loosened out the straps. I had to stop to pull on them every 2 kilometers, which was the time it took the accessory pack to slip all the way down to my front wheel. I find this a huge design failure, considering that these bags were created for off-road use. I emailed Ortlieb about it and got the reply that they would eventually replace the alloy hooks, but for the time being, they recommend me to use the elastic cords to keep it in place. This indeed solved the issue, though took away a bit of space from the accessory pack and didn’t look as neat as it supposes to look. I also went through a day and a half of constant stopping and starting by the time this solution arrived.
I would be very curious to hear offroad riders experience with this bag and the fastening system.
Material
I had the same issue with the material as in case of the handlebar-pack. Only one hole here, though. I’ve sent it back to Ortlieb and they kidly mended it.
Link to the Ortlieb Accessory-Pack, to the mounting manual and the datasheet.
Would I buy this again?
If I bought the handlebar-pack, yes. It’s a great addition to that. But if you can go without a front pack, choose one of the other handlebar bags Ortlieb offers. I have toured for years with my Ultimate Six Classic and it’s been great. I’m looking forward to putting it back on my bike.
Will I use it in the future?
As I’m likely to keep the handlebar-pack, I’ll keep and use this, too, but only on shorter rides.
The pack slipping down and touching the front-wheel from the constant shaking:
(even when I’m going veeeeery sloooow)
Applying the suggestion from Ortlieb’s customer service:
Meanwhile, Ortlieb’s riders on the gravel…
(Image by Ortlieb)
Seat-Pack | Ortlieb Bikepacking Bags review
Most of my research went into choosing the right seat-pack, as I knew that having stability here is key – and not so easy to achieve. I was happy to see that the Ortlieb seat-pack got very good reviews, and I can confirm this: I think this product is great!
By my experience I cannot account for the stability, as I decided to keep my rear rack, loaded with bits of equipment, that gave support to the seat-pack. Pierrick, however, used his as intended and as long as he shaped his bag in the right way when stuffing it, he had no issues with it staying in place.
Ease of access
Like in the case of the handlebar-bag, it took me a while to figure out how to pack this bag: how to hold it when opening/closing, what to keep here and in which order to put my gear in. Here, too, I used many smaller sacks for organizing. Unlike me, Pierrick used this bag as a stuff-sack: in the morning, he stuffed it firmly with clothes and sleeping gear, and he didn’t open it again until the evening, at which point the bag unpacked by itself, vomiting its content behind the bike – a sight that didn’t stop entertaining me.
Fastening
After a bit of practice, I found the attachment/detachment of this bag very easy. It was never perfect because my seatpost isn’t long enough for this bag, but the fact that the bag was supported by the rack, made it a non-issue on this trip.
The one issue I have with this kit is with the elastic chords. These are a super handy addition that allows you to attach extra pieces of easy-access gear to the outside of your pack. The chords are good quality and length, but I don’t like the way they attach to the bike. Ortlieb made them completely removable, only using small plastic half-hooks. It makes packing under the chord tricky, as you have to hold it in many places to prevent it from slipping out, and I also had issues with the chord escaping during the ride, releasing what it was holding on the road> bread, peaches, sweet beignets… I think this detail needs rethinking on Ortlieb’s site. As for me, I would like to see the chords permanently attached at least 3 points to the bag.
Material
The material is the same as the handlebar-packs. It’s a very light fabric, but because it has no rubbing points, I had no problems with this bag. I did pay attention not to rub it against fences or rock walls when leaning my bike to something.
One thing I’m curious about is how long the bag will hold up. You have to pull really hard on the straps to make the bag compact and prevent it from swaying behind your bike, but this means the fabric is under constant tension when riding. So far I’m amazed by the strength of the straps and their attachment, we had no issues during the ride, but we’ve only used them fastened for about 500 hours. I’m looking forward to seeing how long the bag will endure.
Link to the Ortlieb Seat-Pack, to the mounting manual and the datasheet.
Would I buy this again?
Yes, or let’s say that I confidently recommend it to anyone needing bikepacking bags.
Will I use it in the future?
Yes, for quick, shorter rides. However, as it’s unlikely that I’ll ever give up my rear rack, I will look for a different type of bag that offers more volume and easier access, while being narrow. If none exist, I either design and make one (watch this space) or go back to the panniers.
Before you buy…
Make sure to check the length of your seatpost on your bike! This bag requires 14 cm to be properly fitted.
Ortlieb Customer Service | Ortlieb Bikepacking Bags review
I knew from other travellers that Ortlieb has great customer support. They understand the business of long-haul adventures and try to help out wherever you are. Unfortunately, on this trip, I had the chance to check out this part of their services multiple times.
- First, I got in touch with Ortlieb when the zip of one of our cockpit-bags came apart on week two. After a couple of days, I’ve received the reply: an apology and the offer to mend or replace the faulty item as soon we can send it back. There was no point dealing with this on the move and from Africa, so we kept on using the bag and posted it to Germany once we were in Europe. It set us back 18 EUR but we received a replacement in a couple of weeks later.
- My second contact was when the accessory bag started driving me crazy on the off-road bits and I asked for advice. It took a day and a half for the reply to arrive and it was a helpful one. The temporary fix suggested really did solve my problem. I am however curious to see if Ortlieb will fix the issue with the strap and alloy hook used to fasten the accessory bag.
- Third time I got in touch with Ortlieb to let them know about the issues with the weak material and the rubbing points. They offered to mend the bags if I return them to their factory in Germany. I was happy for the fact they offer repair instead of replacement which has a much smaller environmental footprint, so, after arriving home, I sent back the handlebar- and accessory-bags. The postage set me back 25 EUR and the repaired items arrived back in three weeks.
All in all, I can confirm now that Ortlieb has pretty good customer support. I’m not happy I needed to test it out, but I’m grateful for their help and quick replies. All this, however, would have meant little if we were on a long trip, continuing further down in Africa.
During our email exchanges, I shared with their support team most of the observations you read above, in the hope that it will help them to improve on the kit and release a new generation of bikepacking-packs. Even more importantly, I would urge them to communicate the intended use for these bags clearly, as well as the necessary precautions one needs to make before using them. Tape your frames!
Summary | Ortlieb Bikepacking Bags review
I think it’s important to clearly define the intended use for these bags. I think they are a good choice for truly lightweight riders. They are a nice and stylish addition to the slick carbon frames of the aerodynamic-addicts. The weight and battering these bags can handle are about the same the carbon will handle, so I think it’s a good match.
For long cycle touring trips, especially ones where you need to carry weight and volume, I found these bags unsuitable. For anyone heading out for more than a few days, unless you’re aiming to break a record, I would urge you to take a rear rack for support. Its weight will be compensated by the stability it provides and the increased volume you can carry.
The frame-pack is an exception from this rule, for two reasons. On the one hand, it’s sturdy enough to withstand a long trip and the many attachment points will help it handle the continuous weight, while on the other hand, its shape and size make it unsuitable for many carbon frame geometrics. So while Pierrick will definitely replace his bag on the gravel, with another brand, that fits, I will certainly keep mine for the touring bike.
Still, I must admit, the bikepacking setup looks much sexier than the bulky panniers. I also enjoyed how easily I could walk up three flights of stairs with the loaded bike on my shoulder. So I will keep experimenting with this kit, trying to combine it with other types of bags. I also have a bag design in mind that would allow me the keep the narrow, aerodynamic shape of bikepacking bags but give more volume, stability, and much easier access in exchange for a little extra weight. Watch this space!
Time allowing I will try to share our kit-list for this adventure, along with the packing solutions, aka which bag held what.